
Attaching the Retainers
When to Perform This Work
- When moving the machine
Attach the retainer to protect the machine from vibration during shipment.
IMPORTANT Make sure to complete Rinsing and Draining the Coolant Lines before attaching the retainer.
1. Move the position of the spindle head
Procedure
- Check that the workpiece, milling burs, correction jigs, and other such items are not installed in the machine.
-
Close the front cover.
Hold the parts shown in the figure with both hands and close the cover.

- Show VPanel.
-
Open the Machine settings window.
-
Click
 .
.
The Machine settings window is displayed.
-
Click
-
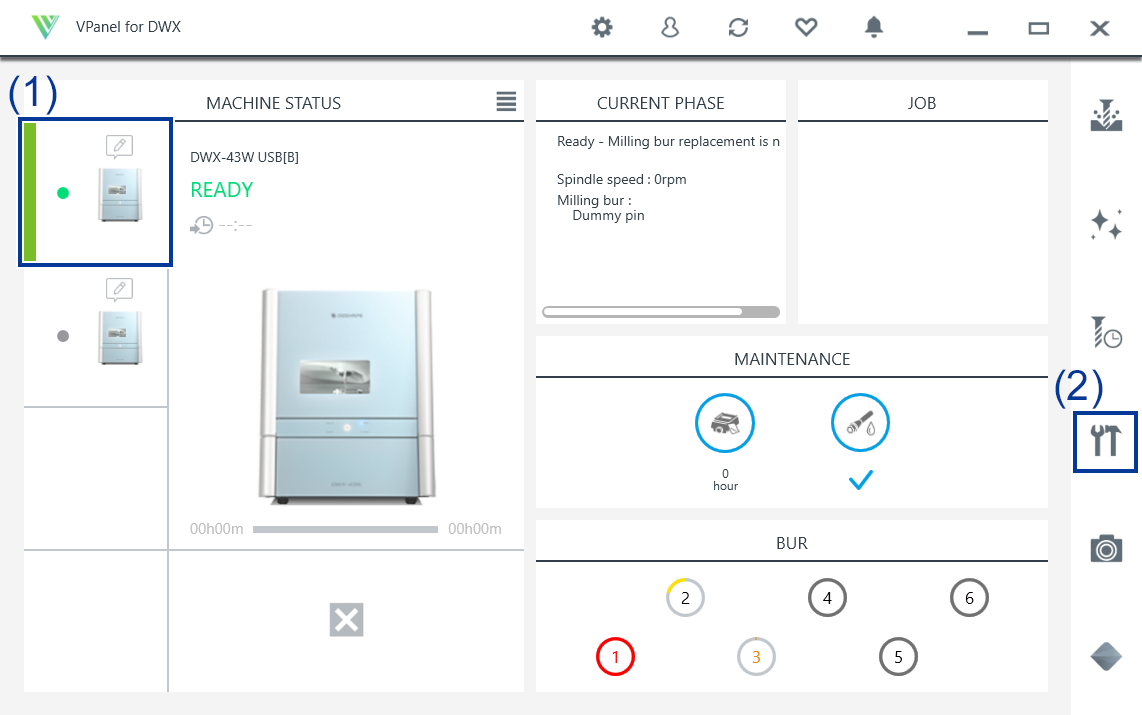
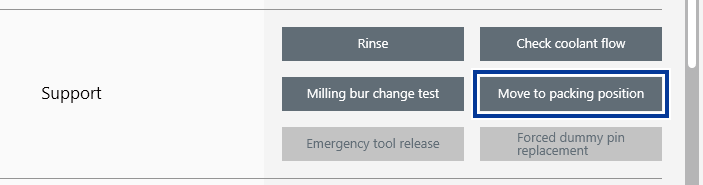
On the Maintenance tab, click Move to packing position.
-
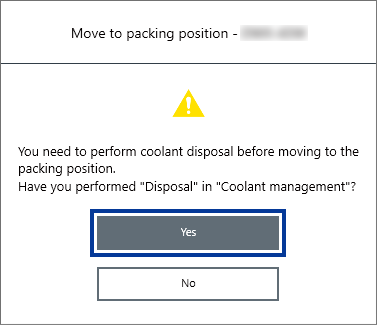
When the following window appears, click Yes.
If you have not disposed of the coolant, perform Rinsing and Draining the Coolant Lines and then proceed to the next work.
-
Follow the instructions in the VPanel display and click OK.
The machine operates, and the rotary axis unit moves to the packing position.
- When a message indicating that movement is complete appears, click OK.
2. Attaching the retainer onto the machine
Procedure
-
Open the front cover.
Hold the parts shown in the figure with both hands and open the cover.

-
Attach the retainer (small).
Attach the retainer (small) by pushing it into the area behind the rotary axis unit.

-
Attach the retainer (large).
As shown in the figure below, face it upward and slide it into the machine. Then attach by pushing the bottom of the retainer (large) into the machine.
IMPORTANT Be careful not to pinch the silicone portion around the spindle head with the retainer. Doing so may weaken the secureness of the retainer.
- Close the front cover.