
Adding/Editing Pin/Block Material
Manually Creating Pin/Block Type Material for Wet Blocks
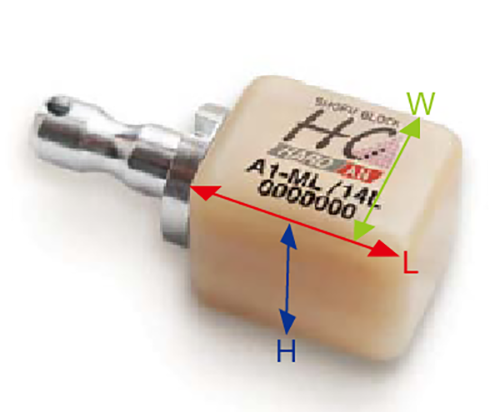
First, you have to measure the correct values (length, width, and height) of the block and add them to the stock library.
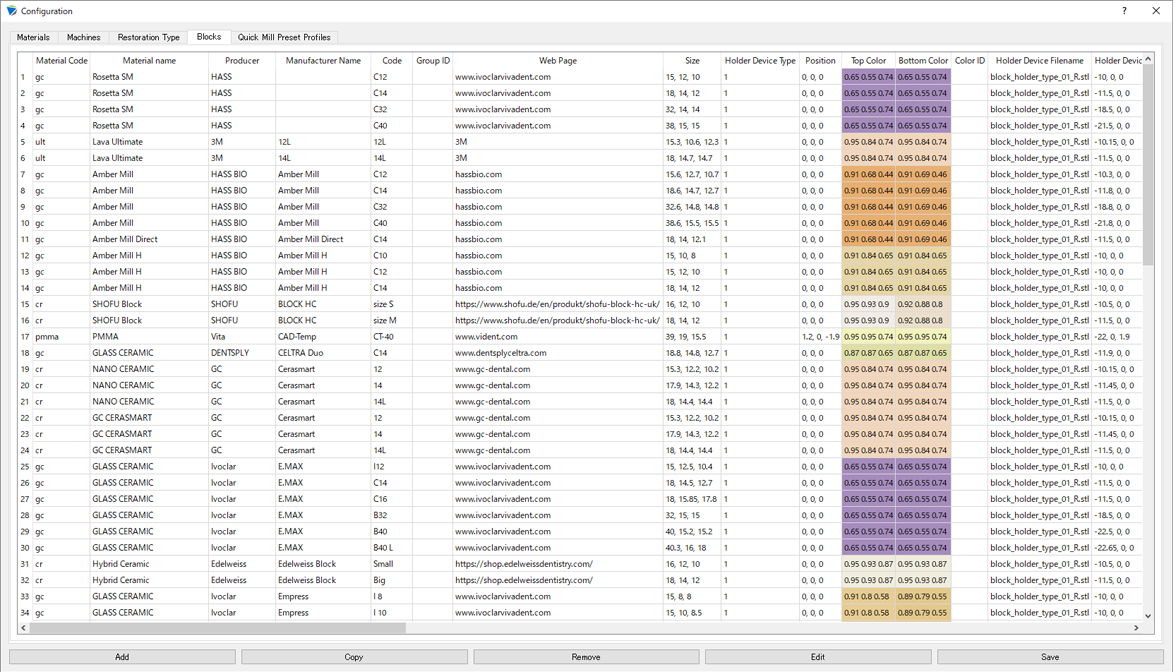
Add these values from the Blocks tab in the stock library.
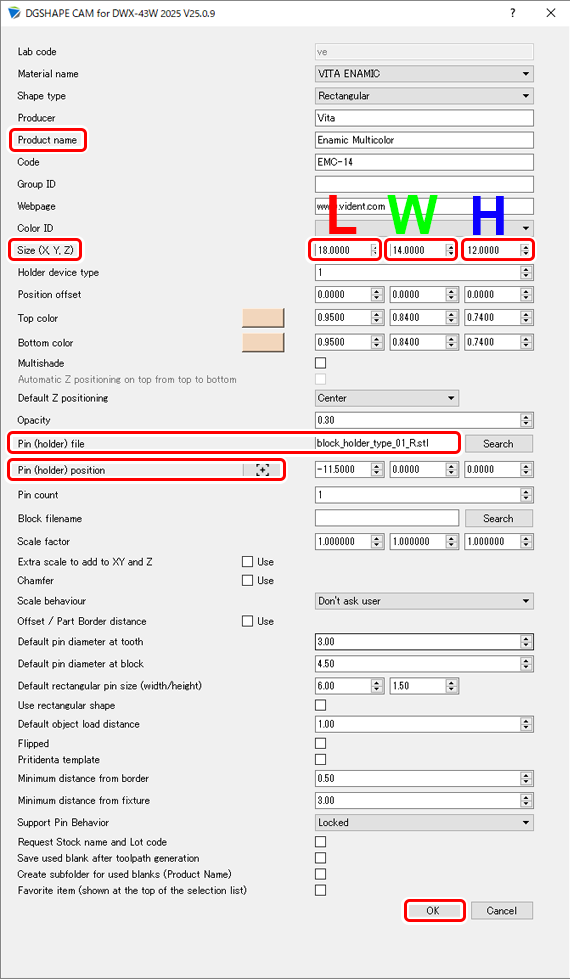
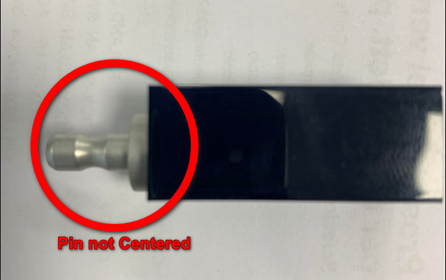
When editing a block, you have to enter the length, width, and height dimensions of the new block.
When adding a new material that has never been cut by the milling machine, it is very important to consider whether the composition and hardness of the material to create resemble those of the material information to copy. For example, if you use the cutting parameters of Vita Enamic to cut Hassbio Ambermill, problems may occur due to the differences in hardness and characteristics of the materials. Discrepancies like this may lead to tool and block damage. To eliminate the chance of machine damage, you have to recognize and take into account minor differences in material composition like those described here.
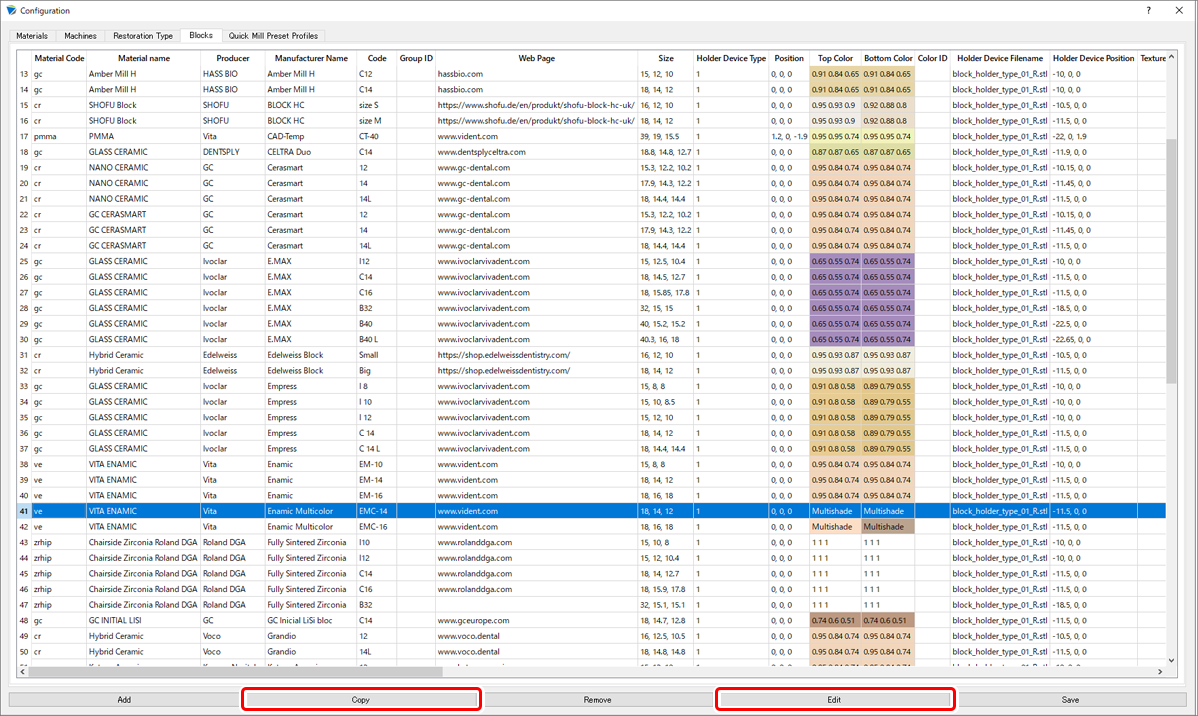
Select OK to finalize the changes. You are returned to the Configuration window. The newly created block is added at the bottom of the list. You can group this block with similar materials to display it in the correct order as desired. Normally, blocks are displayed in order from the thinnest ones to the thickest ones (from the top to the bottom).