
Step 1: Performing a Nozzle Drop-out Test
When performing printing tests successively, you can select Vertical Printing or Horizontal Printing as the printing position for the second and later tests in comparison to the first test.
Performing Printing Tests Arranged HorizontallyUse the following link to view a reference video for this procedure. We recommend that you view this video to understand the overall flow of work.
https://youtu.be/iZfrhQ16J1M
The BN2-20/20A is shown in this video, but the work and operation procedures are the same for this machine.
-
On the home screen, click
 Cleaning.
-
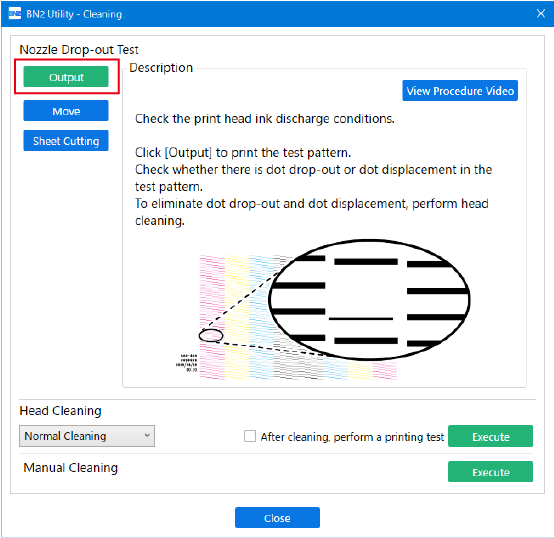
Click Output.
Printing of the test pattern starts.
-
Check whether there is dot drop-out or dot displacement in the test pattern.
Missing blocks indicate dot drop-out. Collapsed or inclined blocks indicate dot displacement.
If dot drop-out or dot displacement is present, proceed to Step 2: Normal Cleaning Method and perform normal cleaning.
 MEMO
MEMOEven if nozzle drop-out does not appear to be improved by cleaning, it may be possible to ignore the effect on products if drop-out occurs in just a few locations. Try printing. If you can judge that the product is not affected, use the printer without any further cleaning.
-
If you have opened the front cover, close it.
If no dot drop-out or dot displacement occurs, preparations for output are finished.
- Click Close to return to the original screen.