
Installing FlexiDESIGNER VersaSTUDIO Edition (Windows)
Create an account and obtain a license before installing FlexiDESIGNER VersaSTUDIO Edition.
FlexiDESIGNER VersaSTUDIO Edition is design and output software for Windows.
Use the following link to view a reference video for this procedure. We recommend that you view this video to understand the overall flow of work.
https://vimeo.com/1003472207/9a95aa79dcStep 1: Creating an Account
-
Click the FlexiDESIGNER VersaSTUDIO Edition icon on the Roland DG Connect Hub home screen.
The sidebar is displayed on the right side of the home screen.

- Click Install.
-
Register a new account or log in to an SAi Cloud account.
- Registering a new account
Enter the activation code in the Activation Code field under Activate a New License or Prepaid Subscription on the left side of the window.
Enter the activation code on the included FlexiDESIGNER VersaSTUDIO Edition Activation Code Guidelines, and then click Activate.
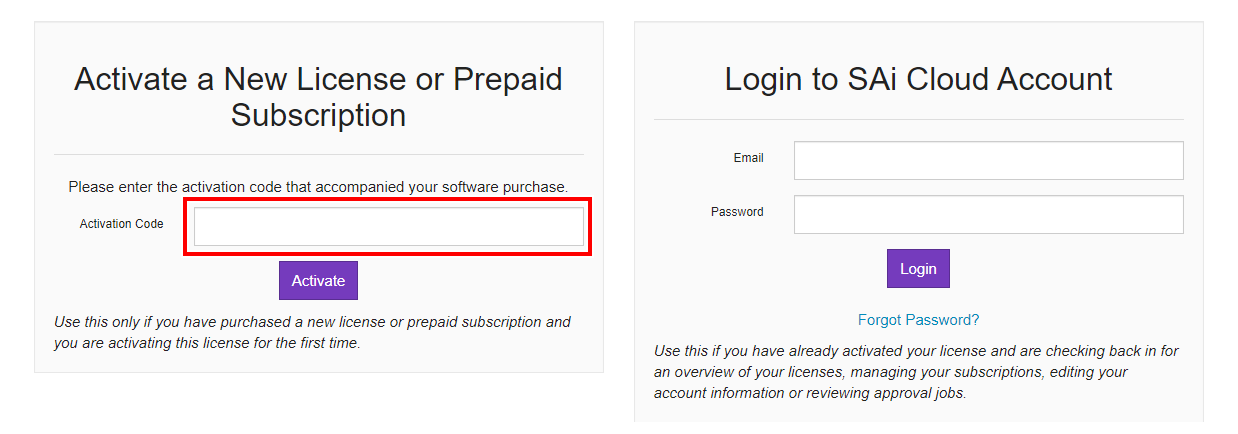
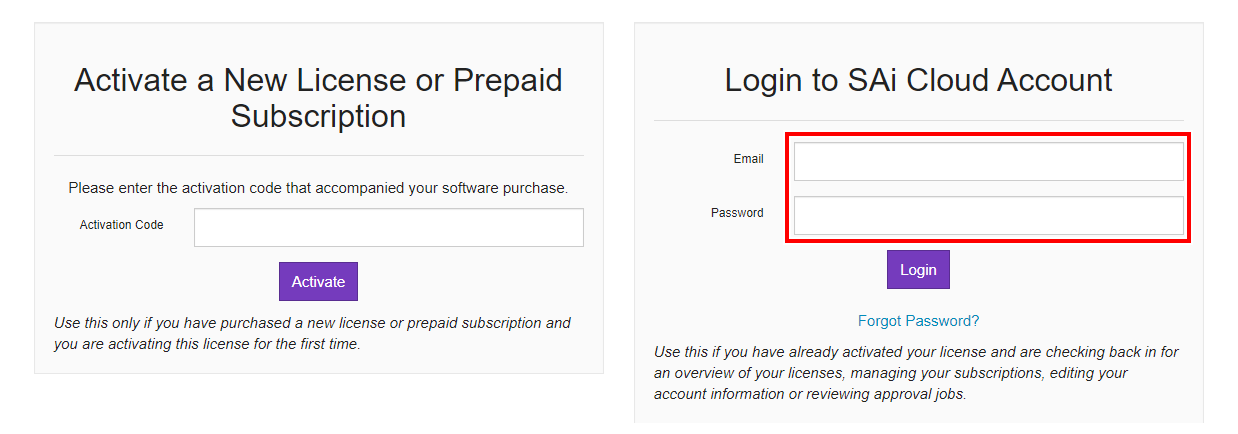
- Logging in with an existing SAi Cloud account
Log in by entering your information under Login to SAi Cloud Account on the right side of the window, and then proceed to Step 2: Downloading FlexiDESIGNER VersaSTUDIO Edition.
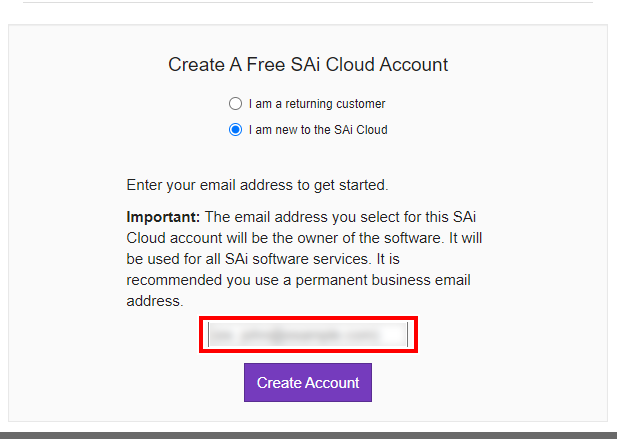
- Registering a new account
-
Enter your email address and click Create account.
An email will be sent to the entered email address.
-
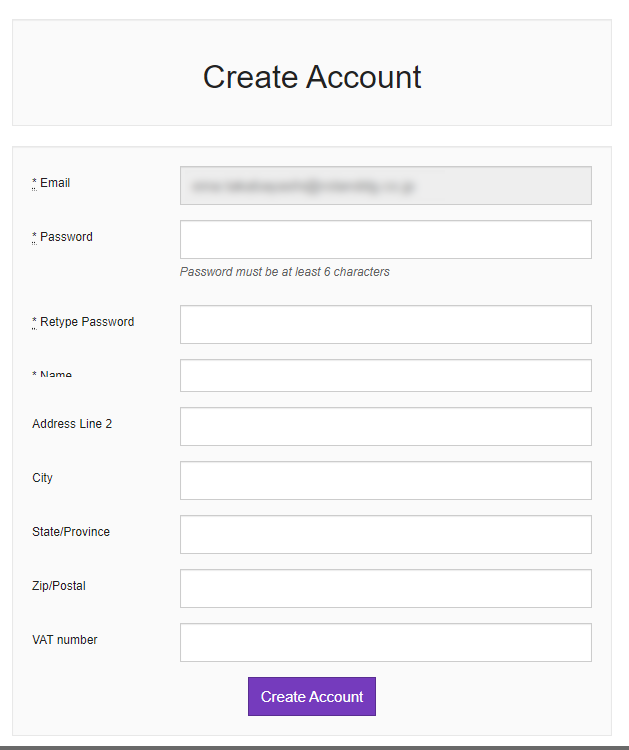
Check the email.
Open the email from SAi and access the URL included inside.
-
Enter the required items and click Create account.
-
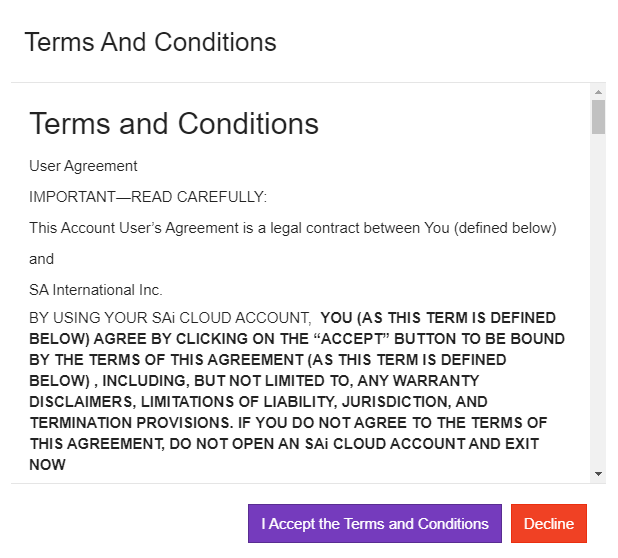
When the Terms and Conditions appear, click I agree to the usage conditions.
-
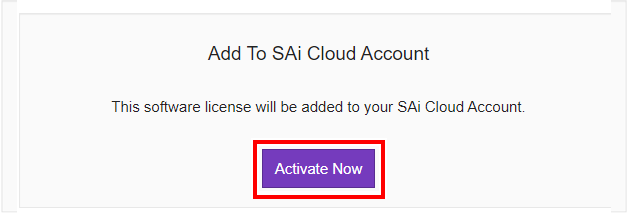
Click Activate now.
-
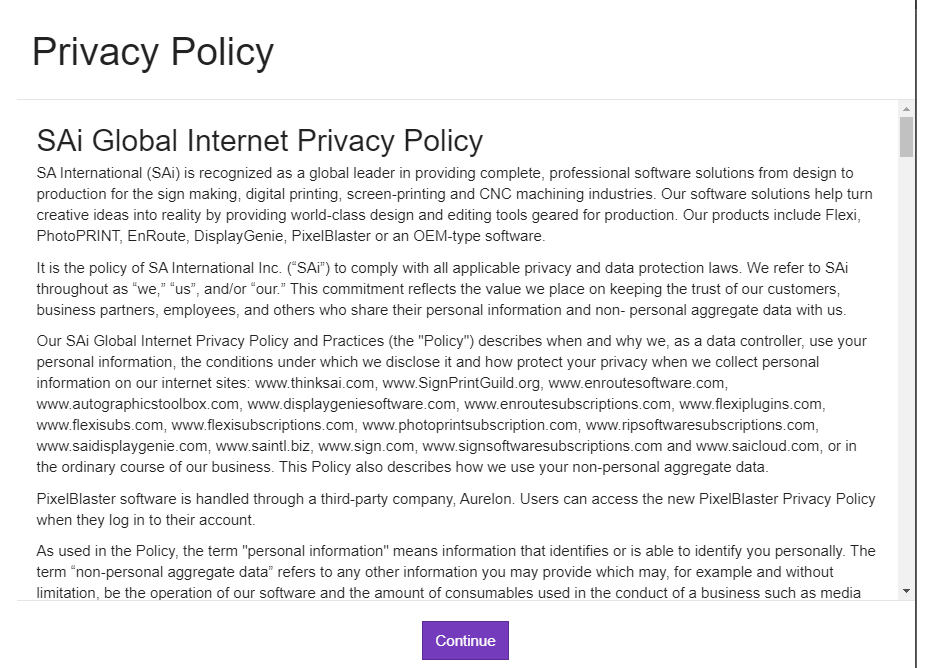
When the Privacy Policy appears, click Continue.
Step 2: Downloading FlexiDESIGNER VersaSTUDIO Edition
-
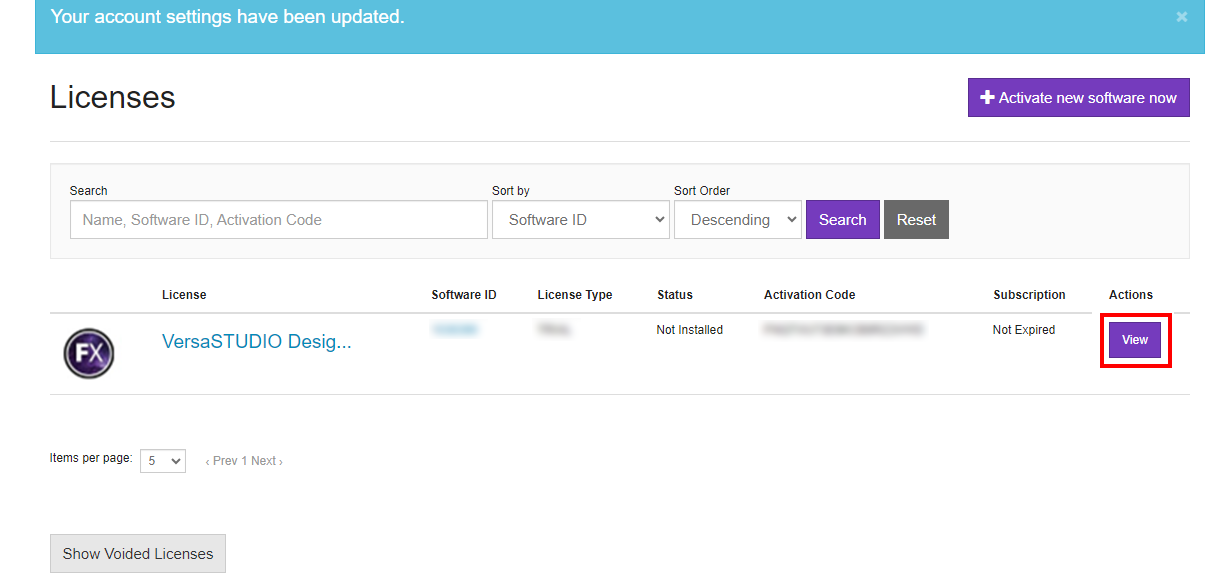
Click View in the Licenses window.
The software's information will be displayed.
-
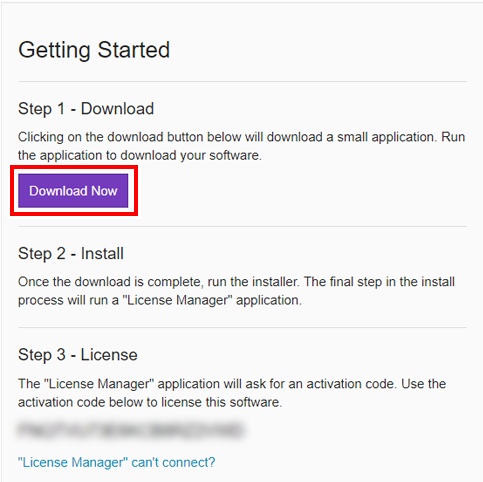
Click Download now.
Step 3: Preparing for Installing FlexiDESIGNER VersaSTUDIO Edition
-
Double-click flexidesigner_versastudio_edition_xxx_xxxx.exe.
When the User Account Control window appears, click Yes (or Allow).
-
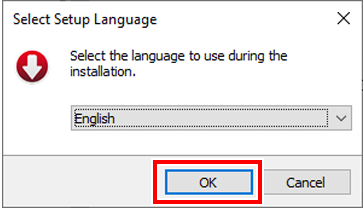
Select the language to use during installation, and then click OK.
- Read the license agreement. If you agree with the contents, select Agree and click Next.
- Specify the installation location and click Next.
-
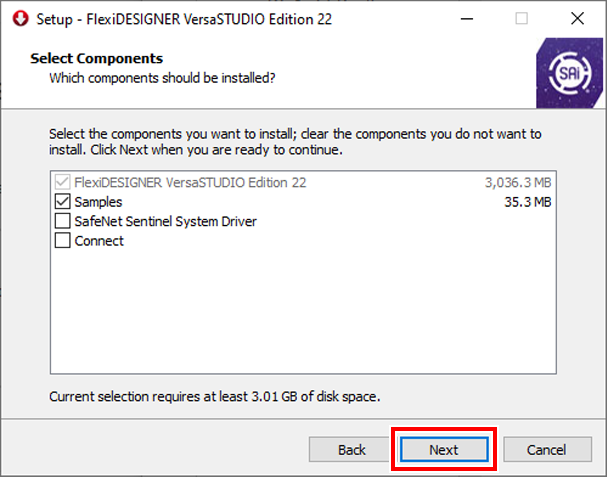
Select the components to install, and click Next.
-
Specify where the shortcut should be created, and click Next.
This completes the preparation for the installation.
Step 4: Installing FlexiDESIGNER VersaSTUDIO Edition
-
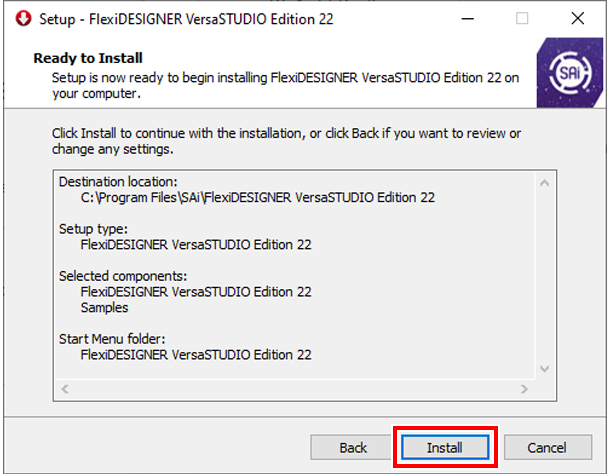
Check the settings in the installation preparation completion window, and if there are no problems, click Install.
-
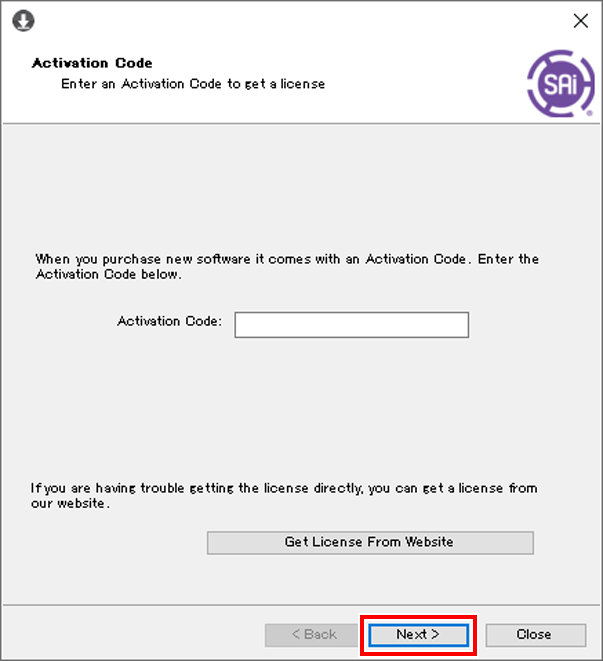
If the Activation Code input window is displayed, enter the activation code.
Enter the activation code on the included FlexiDESIGNER VersaSTUDIO Edition Activation Code Guidelines, and then click Next.
- If Licensing successful is displayed, click Finish.
-
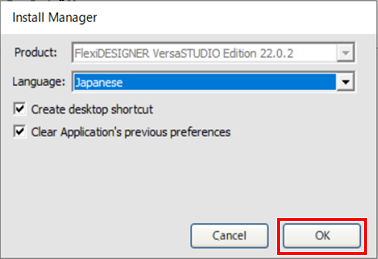
On the Installation Manager window, select the language and applicable options, and then click OK.
-
When the following window is displayed, click Finish.
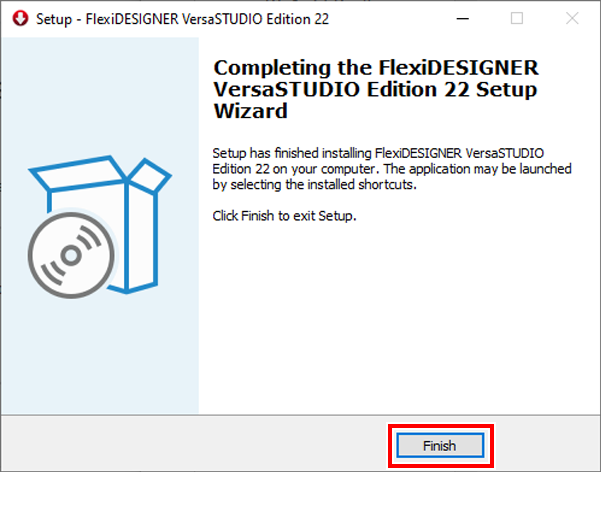
This completes the installation of FlexiDESIGNER VersaSTUDIO Edition.
Step 5: Configuring FlexiDESIGNER VersaSTUDIO Edition Settings
- Make sure the power to the printer is switched on.
-
Click the VersaWorks icon on the Roland DG Connect Hub home screen.
The sidebar is displayed on the right side of the home screen.
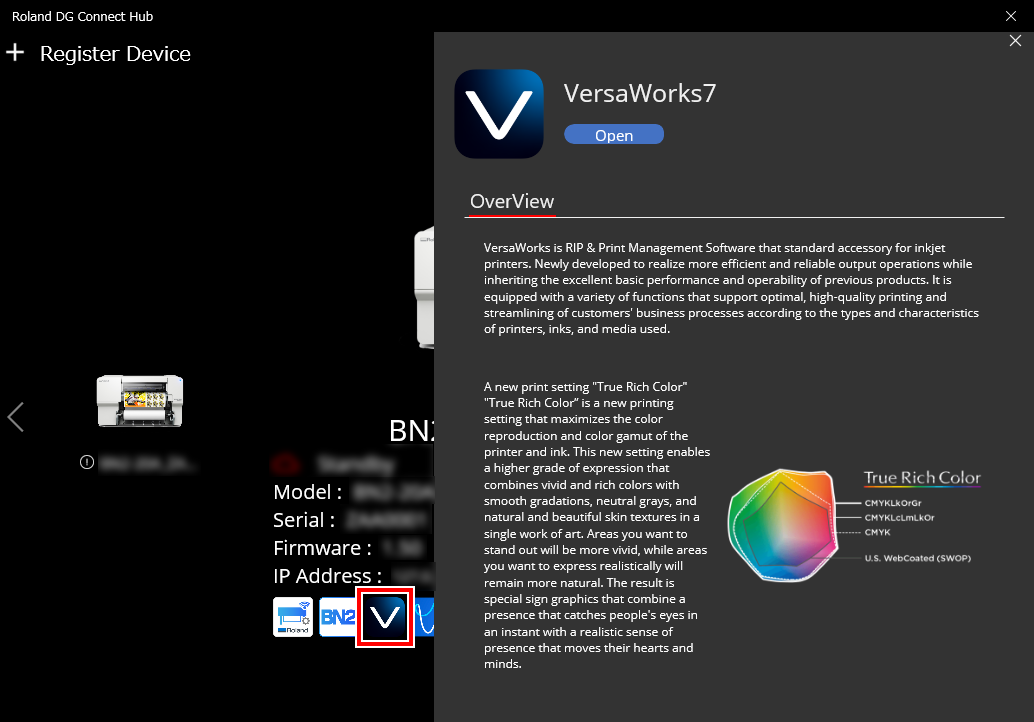
- Click Open.
-
Set the printer to connect.
To register a printer in VersaWorks for the first time, click Add New Printer. The Printer Registration window is displayed, and VersaWorks will search for the connectable printers.
If the search finds zero printers, you will have to register printers manually. If the search finds five or more printers, select the printer to register.
MEMO If you are already using VersaWorks, the machine information is displayed on the home screen. When the detected number of printers is one to four:When five or more printers are detected:When no printers are detected:MEMO If printer search is not possible, check the LAN cable connection status.
-
If there are no problems, click Register.

The VersaWorks home screen shows the registered printer(s). -
If there are no problems, click Register.
-
Click
 to the right of the registered printer, and then click Create Virtual Printer.
Perform this action on all the registered printers.
to the right of the registered printer, and then click Create Virtual Printer.
Perform this action on all the registered printers. -
If you have backed up the VersaWorks settings and job data, restore them.
The previously used VersaWorks settings, etc. are applied to the newly installed computer.