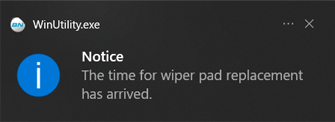
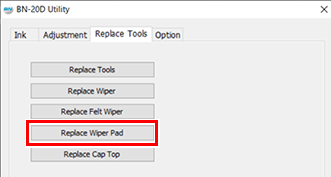
The wiper pad catches ink when the print head surface is cleaned with the wiper. When the message appears on the Utility icon in the computer's notification area, it is time to replace the wiper with a new one. Replace with new items.
For information about purchasing wiper pads, contact your authorized dealer.
IMPORTANT
When the warning alarm sounds during wiper pad replacement
To prevent the print heads from drying out, an alarm sounds about 30 minutes after the start of the operation. Perform the operation by following the message displayed in the Utility window.
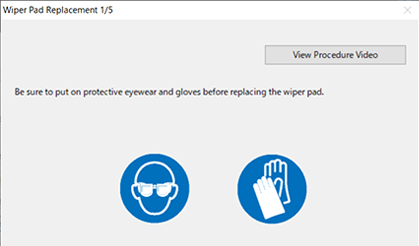
WARNING
Be sure to perform operations as specified by the instructions, and never touch any area not specified in the instructions.
Sudden movement of the machine may cause injury.
MEMO
Depending on this machine's installation environment, the work location may be shadowed, making the wiper pad difficult to see. In this situation, it is recommended that you shine light on the wiper pad to allow the replacement work to proceed smoothly.
MEMO
Use the following link to view a reference video for this procedure. We recommend that you view this video to understand the overall flow of work.