
Replacing the Cap Top
The cap top is a part that prevents ink clogging due to the print heads drying out. The cap top sticks close to the print head surface and sucks out the ink, thereby preventing the print heads from drying out.
To maintain stable printing at all times, replace the cap top once every 6 months.
For information about purchasing cap tops, contact your authorized dealer.
When the warning alarm sounds during cap top replacement
During this operation, the print heads may dry out, leading to print head failure. Therefore, complete the cap top replacement within 30 minutes.
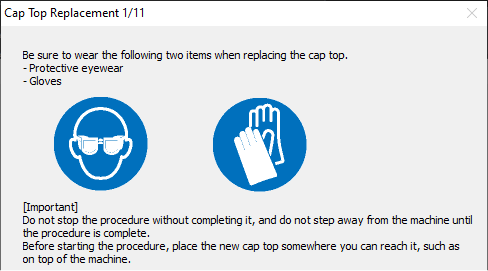
Be sure to perform operations as specified by the instructions, and never touch any area not specified in the instructions.
Sudden movement of the machine may cause injury.
Use the following link to view a reference video for this procedure. We recommend that you view this video to understand the overall flow of work.
https://youtu.be/1eU9UKVuMSo
| Required items | ||
|---|---|---|

|

|

|
| Protective eyewear | Gloves | Light |
- Open the Utility window.
-
On the
Replace Tools
tab, click
Replace Cap Top
.
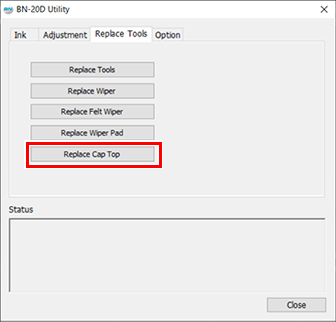
A procedure for replacing the cap top is displayed. Carefully read the on-screen instructions and carry out the work.
- When the operation is completed, close the front cover.