
Step 1: Creating Printing Data
Measure the printing size of the object, set the printing area, and then create print data.
MEMO Follow the procedure below to operate FlexiDESIGNER Ver. 22.0.0, build number 4176. Operation methods may vary depending on the version of FlexiDESIGNER.
Procedure
-
Measure the printing area (print surface of the object).
This is necessary to set the printing area. Make a note of the measurement when you take it. The printed surface of smartphone cases is 134 mm (5.28 in.) wide and 67 mm (2.64 in.) long when placed horizontally. This time, to print on the entire surface of the case, set the printing area to be larger than the printed surface. Any printing outside of the edges of the printed surface will be wasted, but you can print all the way up to the edges.
-
Start FlexiDESIGNER.
-
Set the printing area according to the procedure below.
-
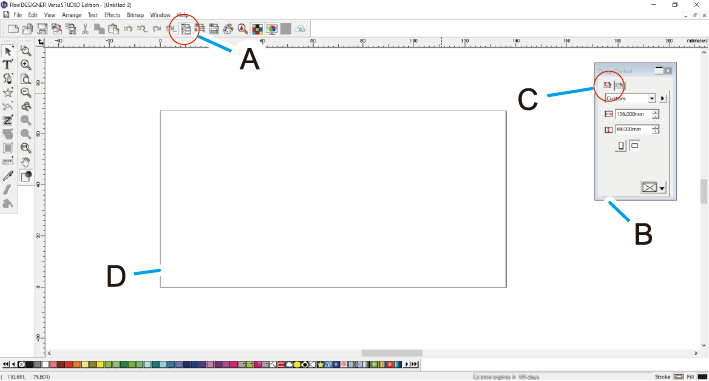
Click the
 icon (A).
The DesignCentral dialog box (B) opens.
icon (A).
The DesignCentral dialog box (B) opens. -
On the
 tab (C), click the pull-down menu [▼], and then select Custom.
-
Click the
-
Create data for printing.
Here, the photos are imported, sized, and trimmed. A primer plate is then created to improve adhesion and a white plate is created to prevent the color of the printed object from showing through.
-
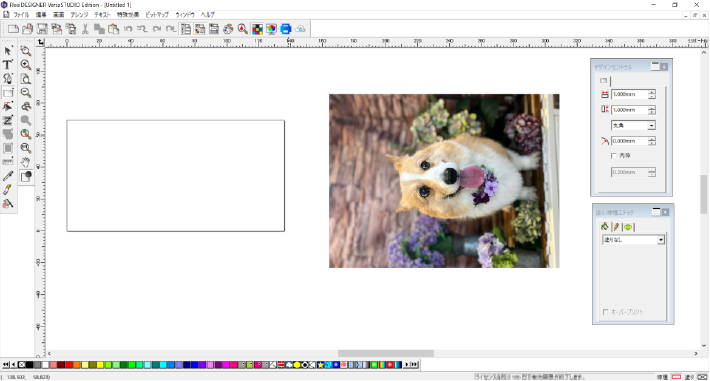
Click the desired location, and then paste the photo data into the design area.
IMPORTANT If the photo data size is large, use
 Zoom Out or "Ctrl + Scroll" to view the entire photo data.
 -
Select the photo data, and then adjust the size.
- Select the loaded photo data.
- In the DesignCentral dialog box, select the
 tab and click
  .
.The loaded photo will rotate 90° counterclockwise.
- In the DesignCentral dialog box, select the Proportional check box.
- Enter a size close to that of the printing area and then press Enter.Adjust the size based on the size of the image to be trimmed. Here, set a width of 145 mm (5.71 in.) for the printing area (136 mm, 69 mm [5.35 in., 2.72 in.]).
-
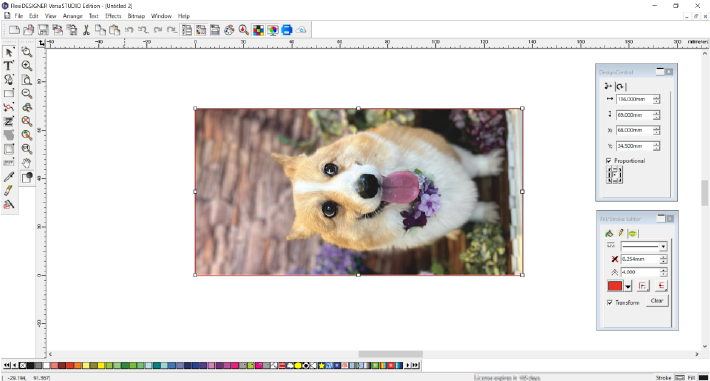
Perform trimming.
- Select
 Rectangle Tool, and create a frame for the printing area (136 mm × 69 mm [5.35 in. × 2.72 in.]).Since this frame will be used as an outer frame for trimming, click
 and then configure the settings as follows.
 tab:No fill
 tab: Type of line: Solid line; Line color: Red
- Select the
 Select Tool, and then move the frame to determine the position to be trimmed.
 - With the image and frame selected with the selection tool, click .
The image is trimmed with a red line.
- Select
-
With the image and frame selected, click .
The selected image is placed in the center of the printing area.
-
Click the desired location, and then paste the photo data into the design area.
- Click to save the data.