
Step 2: Setting the Computer's Network (Windows)
MEMO Operation methods may vary depending on the version and build of the OS.
Procedure
- Log on to Windows as the Administrator or a member of the Administrators group.
-
Open Control Panel.
Search for "Control Panel" from the taskbar.
- Click Network and Sharing Center.
- Click Ethernet.
-
Click Properties.
If a User Account Control window appears, click Continue.
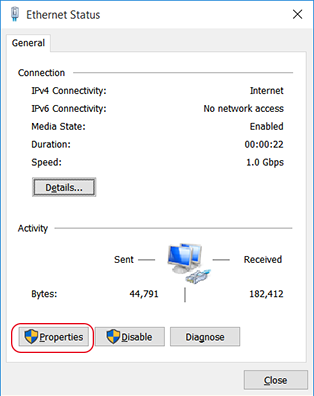
The Ethernet Properties screen appears.
-
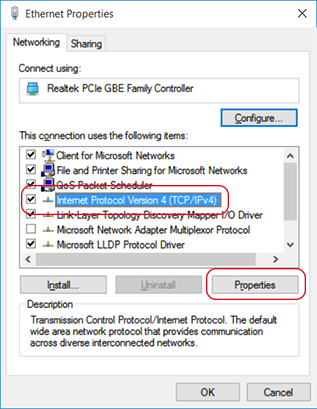
Select Internet Protocol Version 4 (TCP/IPv4) Properties, and then click Properties.
If the Internet Protocol check box is clear, select it.
-
Select Use the following IP address, enter the IP address and subnet mask, and then click OK.
MEMO The addresses in the following table are examples used for the explanations in this manual. Enter the desired IP address and subnet mask.
Item Address to enter IP address 192.168.0.XXX Subnet mask 255.255.255.0 "XXX" represents a number from 1 to 254. However, do not use the same number as set in "Make the Network Settings on the Printer."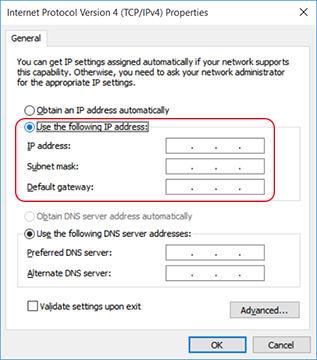
-
Click the following buttons to return to the original state.
- Cancel in the Ethernet Properties window
- Cancel in the Ethernet Status window