
2. Selecting the Media
Procedure
-
Tap
 Setup.
The registered media is displayed in a list.
Setup.
The registered media is displayed in a list.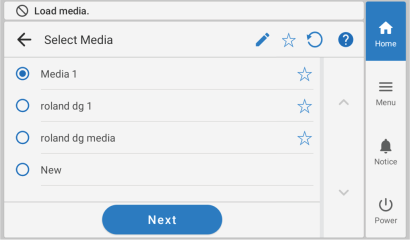
- Select the media name to use.
MEMO
-
Tapping
 makes it possible to search the registered media by keyword.
To reset the entered keyword, tap
 .
. -
Tapping
 to the right of the media name will change the symbol to
  , and the media will be registered to Favorites.
Tap the Favorites filter
at the top of the operation panel to turn the filter on and show only favorited media.Tap
to turn the Favorites filter off.Tap
to turn the Favorites filter off () and reset all keywords. - Keyword searching and the Favorites filter can be used at the same time.
-
- Tap Next.
- The Setup Method screen will appear. Select Use Take-up Unit or Do Not Use Take-up Unit.
- Tap Start Setup.
-
When Printing Area (Width) appears, use the following procedure to configure the settings.
MEMO
The media selected in Step 2 is media whose printing area was set manually when registered as new media. The printing area must be set manually each time, so the Printing Area (Width) screen appears.
-
Hold down
 or
or  to move the center of the blade (A) approximately 2 mm (78.74 mil) to the inside (B) from the left edge of the right pinch roller.
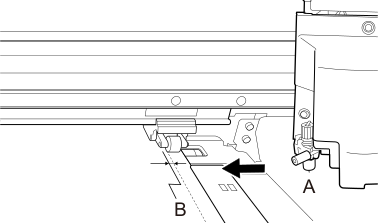
-
Hold down or to move the center of the blade (A) approximately 2 mm (78.74 in.) to the inside (B) from the right edge of the left pinch roller.
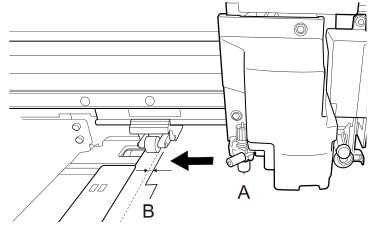
-
Hold down