
1. A: Determining the Positions of the Media
When using transparent media, whose edges cannot be detected, and when is set to Disable, the suction fan does not activate, so media cannot be loaded with this procedure. In these cases, refer to 1. B: Determining the Positions of Media (If Media Edge Detection: Disable).
By default, Skewing Correction Support at Setup is set to Enable.
-
Tap
 on the operation panel.
The sub power is switched on.
on the operation panel.
The sub power is switched on. - Open the front cover.
-
Move the media clamps to the outside of the grit rollers on the left and right edges respectively.
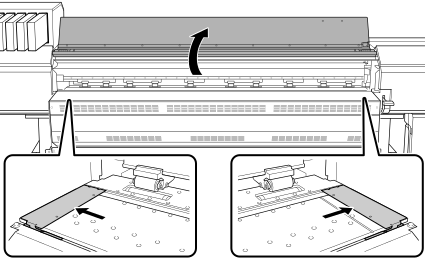
-
Move to the rear of the printer. Release the locking mechanisms of the media holders, and then draw them to the left and right ends respectively.
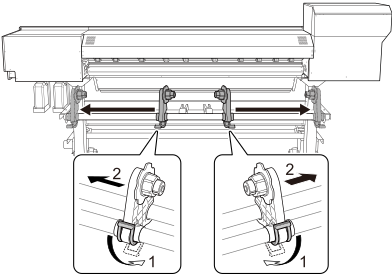
- From the rear of the printer, pass the leading edge of the media between the pinch rollers (A) and the grit rollers (B).IMPORTANT If the leading edge of the media is bent, cut the bent part before loading the media, as it may be difficult for the media to enter the dryer entrance.
You will hear a beep. Approximately 5 seconds later, you will hear two beeps, and then the suction fan will activate. While this fan is operating, the media will not move backward even if you remove your hands from it.
When loading the media from the front of the printer, feed the leading edge of the media (the side where printing will start) over the platen, and then pull the media to the front to activate the suction fan.
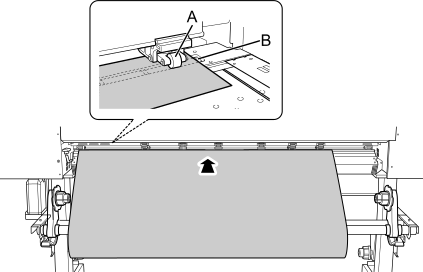
- (Move to the front of the printer.) Insert the leading edge of the media into the dryer.
-
Make sure both edges of the media are above the grit rollers.
Be sure to place the right edge of the media on the right-end grit roller.
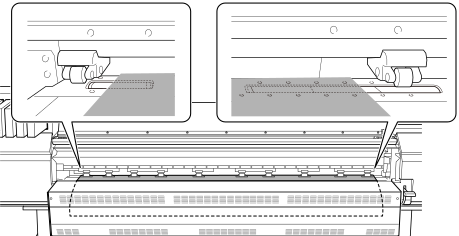
-
Move the left and right pinch rollers, placing them on both edges of the media.
Position them approximately 10 mm (0.39 in.) from each edge of the media.
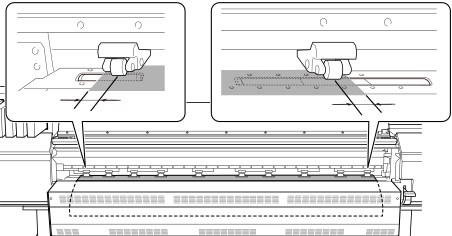
IMPORTANT- Be sure to use the left and right pinch rollers. The force with which the media is pinched varies between the middle pinch rollers and the left and right pinch rollers. Using the middle pinch rollers to pinch the media edges will lead to unstable media feeding.
- If you want to readjust the media position before securing it in place, redo the procedure from step 5.
MEMO To smoothly move the pinch rollers, push down close to the rail. -
Move the middle pinch rollers (B) over all the remaining grit rollers (A) covered by the media.
There are grit patterns (C) wherever there are grit rollers.
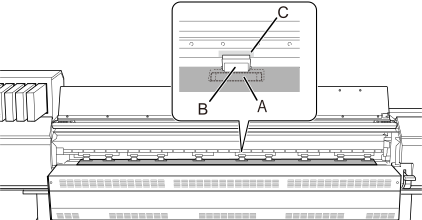
IMPORTANT- Place the middle pinch rollers over all the grit patterns within the media width. If you have forgotten to place the middle pinch rollers, the media will be skewed during printing or will come loose, which will have an effect on the printing quality.
-
The middle pinch roller will not lower onto the three grit rollers from the right end. Place the middle pinch roller on a grit roller other than these three.
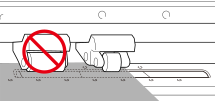
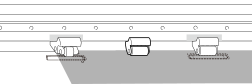
- There may be extra middle pinch rollers depending on the width of the media being used. Move the extra middle pinch rollers to positions where no grit patterns are present. Where no grit patterns are present, the middle pinch rollers will not come down.
-
Lower the loading lever (front).
The media is held in place.
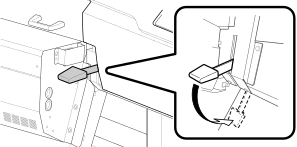
IMPORTANT If you want to readjust the media position before securing it in place, redo the procedure from step 5. -
Line up the edges of the media with the centers of the holes of the (left and right) media clamps.
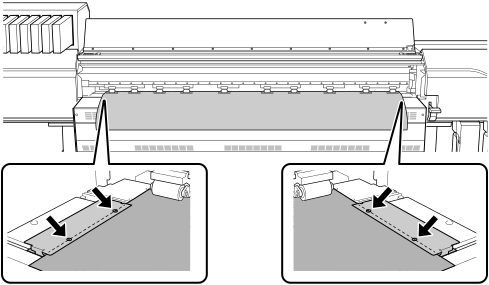
IMPORTANTBe sure to use the media clamps when you load media.
If you attach the media clamps directly before printing after the media setup is complete, the machine may print on the media clamps.
- Close the front cover.