Setting the Take-up Unit
The settings will have to be changed from the defaults when:
- Using weak media
- Taking up the media with an inward curl
- Printing multiple colors of ink in layers such as by printing CMYK ink on top of white ink
Procedure
-
Tap
 .
.
- Tap .
- Tap Take-up during Cutting.
-
Select the setting from those shown below and tap Save.
Enabled The media is taken up during cutting while slack is being created. This prevents the media from sticking to the floor. Make sure the media is taken up at least halfway around the paper tube beforehand.
Disabled*1 The media is taken up after all cutting finishes.
*1 Default settingsMEMO- Enabled cannot be performed in the following situations:
- /Printing Test 2(Correction Values)
- /Printing Test 2(Correction Values)
IMPORTANT When is set, to preserve cut quality, the speed may be limited to the optimum speed for Cutting Speed and Rise Movement Speed depending on the set media.Fine-tuning the Cutting Conditions - Enabled cannot be performed in the following situations:
- Tap Take-up Method.
-
Select the setting from those shown below and tap Save.
Loose Winding*2 The media is taken up with some slack. This is suited to PVC and other such stiff or slippery media.
Tension Winding The media is stretched and taken up. This is suited to tarpaulin and other such weak media and media that does not slip easily. (To keep the media stretched at all times, limit the media feeding to one direction. Set Pullback After Printing under Heater Settings to Disable.) *2 Default settingsIMPORTANTWhen the output data includes the cutting operation, this setting is disabled, and no take-up is performed until the output of the piece of data is finished.
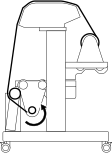
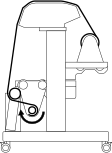
- Tap Take-up Direction.
- Select the setting from those shown below and tap Save.
-
Tap
 .
The home screen appears.
.
The home screen appears.