When dividing a large job for printing (tiled printing), add an overlap width to the divided part (tile).
The position for adding overlap (A) can be set individually from top, bottom, left, or right. Specify whether to print the overlap line (B). If printing, specify the stroke width and color. Trim marks (C) are added to the left and right of the overlap.Figure 1.
A
Overlap
Specify the position for adding overlap in Position.
Specify the overlap width between 0.5 and 100 mm (0.02 and 3.93 in.) in Size (D).
B
Overlap line
Overlap is added when Print Overlap Lines is selected.
Specify the overlap line width between 0.1 and 0.5 mm (3.94 and 19.68 mil) in Thickness.
Specify the overlap position in Position under Overlap.
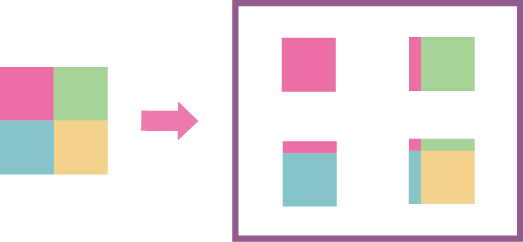
When applying from lower right
Creates overlap widths at the top and left of tiles. Set this when applying the lower-right (yellow) panel first, followed by the remaining three panels.
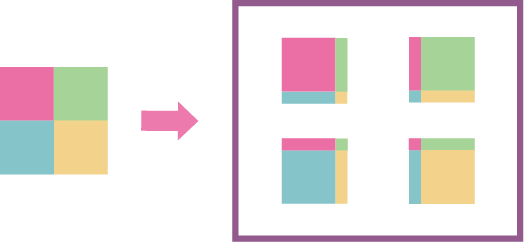
When no application order is determined
Sets overlap on all four sides. Application can be started from any tile.
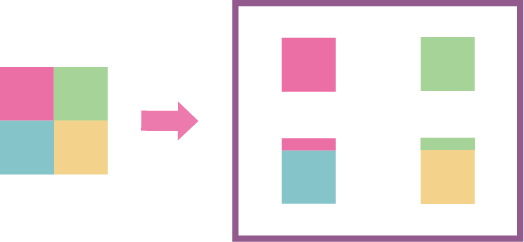
When applying to two panels
Sets overlap from the bottom. Set this when overlap is required only vertically, not horizontally.
Configure the advanced overlap settings.
Size
Specifies the overlap width.
Print Overlap Lines
Turn this on to print overlap lines.
Thickness
When printing overlap lines, specify the overlap line width.
Color Settings
When printing overlap lines, specify the overlap line color using the value of CMYK or RGB.
When printing trim marks, specify Cut Line Length.
When trim marks are not necessary, specify 0 mm (0 in.).


 on the left side of the job tool area, and then click
  Settings.
 Clip and Tile.