Configuring Cutting Settings for Landscape Print Data
Separate and print the print data. Then, remove the media and cut it with a cutter made by Fotoba or a similar company. As an example, this section contains the procedure for separating the following print data vertically into three parts and setting the Fotoba cutting marks.
Procedure
Add the print data to the job list.
Use one of the methods below to open the Job Settings window.
Double-click the job to set.
Right-click the job to set, and then click Edit Design - Job Settings.
With a job selected, click on the left side of the job tool area, and then click Job Settings.
Click Mark.
Set the following with Marks.
Type: FOTOBA Cutline Marks
Print Location: Select the Top, Bottom, Right, and Left checkboxes.
Click Clip and Tile.
Select Number of Tiles for Tiling, and then configure the following settings.
Horizontal: 3
Place alternated: Selected
Set the following with Overlap.
Type: ALL Corners
Cut Line Length: 0
Click OK.
You are returned to the main window.
Right-click a job, and then click Edit Design - Generate Cut Position Adjustment Job.
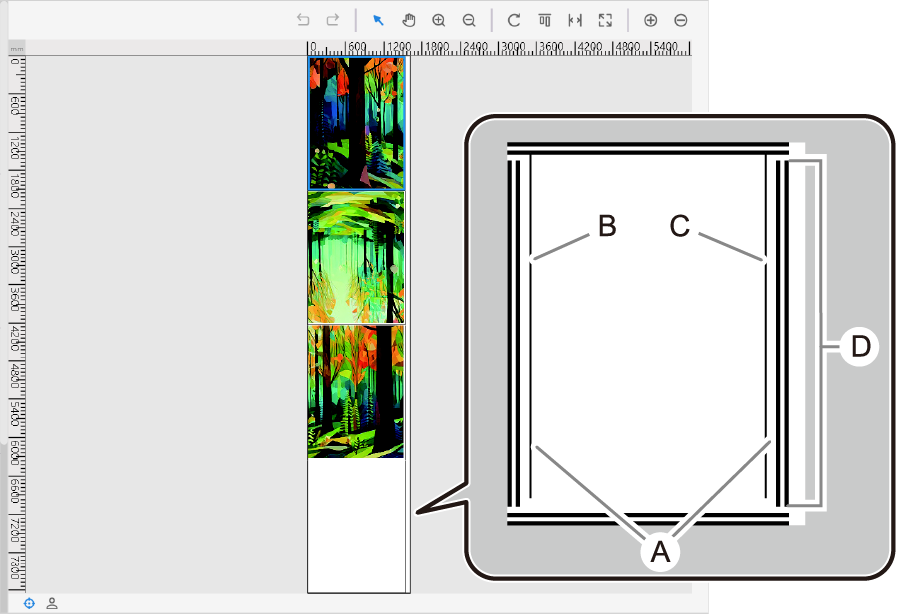
A
Cutting position adjustment line (line width: 0.1 mm [3.94 mil])
B
Left-side adjustment line (line that does not take overlap into account)
C
Right-side adjustment line (line that does not take overlap into account)
D
The same length as the Fotoba marks
A nested job including the job for cutting position adjustment is created. After printing, load the media on the cutting machine, adjust the cutting positions, and then cut the media.


 on the left side of the job tool area, and then click
  Job Settings.
 Mark.
Mark. Clip and Tile.