
Realizar solo corte/impresión y corte continuo
-
Click
 for the queue folder that you want to use.
The Propiedades de la cola window appears.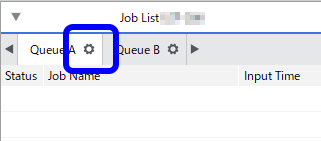
- Haga clic en
 .
. - Seleccione uno de los siguientes ajustes de la lista Modo funcion. para que coincida con el propósito:
- Para realizar solo corte
- Sólo cortar
- Para realizar impresión y corte continuo
- Imprimir y Cortar
- Para realizar solo corte
-
If necessary, perform the operations shown below.
To cut along all lines (paths) drawn in vector format in the data
Select the Cortar todas las rutas check box. All paths will be recognized as cutting lines and will be cut regardless of whether they are drawn with the spot color (CutContour).
To cut the border of the job regardless of whether a cutting line is present
Select the Cortar los límites de la imagen check box.
To pull back the media after printing
- Select the Volver al origen después de imprimir check box.
To return the media to the origin (the position before cutting) after cutting
Select the Volver al origen después de cortar check box.
- To specify the number of cut passes
- Select the Cortar recor. check box, and then specify the number of passes.
To configure printer cutting conditions such as the blade force
Select the Ajustes de condiciones de corte check box to enable the settings.Configurar las condiciones del corte
- To feed out media according to the size of the data sent from the computer before starting output, thereby preventing the media from being pulled out with excessive force
- Select the Execute PREFEED Operation check box. The media is fed out and is then pulled back to the output-start location.
- Configure other settings such as the media settings if necessary.
-
Click Aceptar.
IMPORTANTE
- The source data of the job is an EPS file.
- A cutting line has been drawn around the border.
If both of the above conditions are met, additional settings are required. If you do not configure these additional settings, it may not be possible to cut a part of the border. Configure the settings shown below.
- In the Propiedades de la cola window, click
 .
. - Enter the value in Margen under EPS.
If you scale the image in the Propiedades de la cola or Ajustes de la tarea window, the size of the margin will also be scaled.
When you add a job to the job list, the margin set with Margen is automatically added within the range specified by the border.
- Añada el trabajo que contiene líneas de corte a la lista de trabajos y, a continuación, comience a imprimir.Operaciones básicas para imprimir
- Cuando Sólo cortar está seleccionado
- El corte comienza a lo largo de las líneas de corte del trabajo seleccionado.
- Cuando Imprimir y Cortar está seleccionado
- Primero, se imprime el trabajo. Cuando ha finalizado la impresión, el corte comienza automáticamente.
IMPORTANTETambién puede cambiar estos ajustes en la ventana Ajustes de la tarea después de añadir una tarea a la lista de tareas. Sin embargo, no se puede cambiar el ajuste Cortar todas las rutas o el ajuste Margen en EPS.
Si, después de imprimir, desea dejar que la tinta se seque antes de comenzar a cortar, ajuste Tiempo secado de acuerdo con la información en Ajustar el tiempo de secado después de la impresión.
- Cuando Sólo cortar está seleccionado