Processing a Job by the RIP or Printing a Job Automatically
-
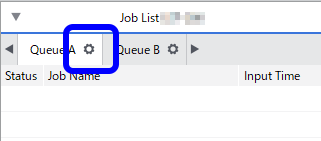
Click
 for the queue folder that you want to use.
The Queue Properties window appears.
-
Click
 .
.
-
From the Action list under Action for Incoming Jobs, select one of the following settings:
Option Description RIP Only Processing by the RIP is automatically performed when a job is added to the job list. RIP and Print Both processing by the RIP and printing are automatically performed when a job is added to the job list. With this setting, you cannot specify the print count. IMPORTANT: You can select the Auto Rotate to Save Media check box to reduce the amount of wasted media. When the length of a job is bigger than its width, the job is rotated 90 degrees and arranged on the media in order to reduce the length. This function operates independently from what is selected for Action. If you select this check box, jobs will be rotated and arranged on the media automatically even if Do Nothing is selected for Action. -
Click
 .
.
- Configure the media size in Media Settings.
-
Click
 .
.
- Configure the settings in Media Type and Print Quality.
- Set other items as necessary.
-
Click OK.
When you add a job to the job list, the set process is performed automatically.