
Selecting the Color Setting
Procedure
-
Click
 for the queue folder that you want to use.
The Queue Properties window appears.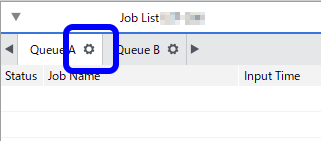
- Click
 .
. - Select the color setting from the Settings list under Color Settings.Depending on the printer you are using, some items may not be displayed.
True Rich Color / True Rich Color 2 / True Rich Color 3*1 Despite its high-saturation output, it has a wide color gamut, more naturally producing colors such as gray and peach.
True Rich Color 2 is enabled only for CMYK images.
True Rich Color 3 is enabled for both CMYK and RGB images.
Pre-Press General Applies the standard settings used for printing in general printing environments. Pre-Press U.S. Applies the standard settings used for printing in general printing environments in the United States. Pre-Press EURO Applies the standard settings used for printing in general printing environments in Europe. Japan Color Applies the standard settings used for printing in general printing environments in Japan. MAX Impact Produces vibrant images suitable for signs. Sign & Display Does not use the profile embedded in the image data (the profile specified by the image data). You can obtain good results by selecting this setting when you want to print dark colors over the entirety of signs. MAX Density U.S. Color conversion just for the illustration is disabled and output is performed as defined in the data. You can obtain good results by selecting this setting when you make the color density a priority. MAX Density Japan Color conversion just for the illustration is disabled and output is performed as defined in the data. This setting is almost the same as MAX Density U.S., but output is performed while preserving the primary colors. Density Control Only Color conversion is disabled and output is performed as defined in the data. The amount of ink is limited, so the ink does not overflow. Custom You can select the input profile and the matching method (color conversion) settings individually. Custom High-Performance You can select the input profile and the matching method (color conversion) settings individually. This assumes high performance. Full Page Conversion Mode Applies the same matching method for both raster and vector objects. *1 True Rich Color 3 with the broader color gamut is recommended. Select the same color setting when you set True Rich Color or True Rich Color 2 before updating VersaWorks and want to output the same color. - Click OK.
- The color settings can be changed in the Job Settings window.
- VersaWorks offers options to configure input/output profiles and matching methods to print as accurate a reproduction of the colors in the source data as possible. Color settings are preset combinations of input profiles and matching methods necessary for color management. In VersaWorks, you can perform color management by selecting the color settings.