
2. Select the media.
Procedure
- Tap
 Setup.The registered media is displayed in a list.
 - Select the media name to use.
- Tap Next.
- The Setup Method screen appears. Select whether to use the take-up unit.
- Tap Start Setup.The cutting carriage moves and detects the width of the media and the positions of the media clamps. This operation is called initialization.
-
When Printing Area (Width) screen appears, use the following procedure to configure the settings.
MEMO The media selected in step 2 is media whose printing area was set manually when registered as new media. The printing area must be set manually each time, so the Printing Area (Width) screen appears.
-
Hold down
 or
or  to move the center of the blade (A) approximately 2 mm (0.08 in.) to the inside (B) from the left edge of the right pinch roller.
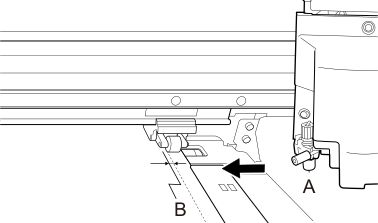
-
Hold down or to move the center of the blade (A) approximately 2 mm (0.08 in.) to the inside (B) from the right edge of the left pinch roller.
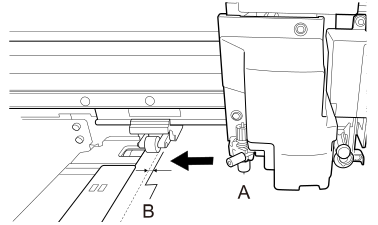
-
Hold down