


Step 4: Reinstalling the Machine
Procedure
- Reinstall the printer immediately, and then remove the retainer securing the print heads in place.For storage, attach the retainer in the position indicated in the figure.

- Press the sub power button.The screen shown below appears, and then the machine is filled with TR2 cleaning liquid. The (approximate) remaining time for the procedure is displayed on the screen. (The display shown below is an example. "01:40" = "1 minute and 40 seconds")
 MEMO:If the cleaning liquid pouch is empty, or is not attached, the following screen will be displayed. Install a cleaning liquid pouch and press [ENTER].
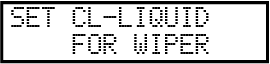 Once the machine is filled with TR2 cleaning liquid, the following screen is displayed and the power turns on.
 MEMO:
MEMO:After the printer is reinstalled, the media holder adjuster must be adjusted by a suitably qualified worker. This work must be performed by a Roland DG worker. Contact your authorized Roland DG Corporation dealer.