


Replacing the Separating Knife
WARNING
Be sure to perform operations as specified by the instructions, and never touch any area not specified in the instructions.
Sudden movement of the machine may cause injury.
CAUTION:
Do not touch the tip of the separating knife.
Doing so may result in injury.
| Required item |
|---|
 |
| Replacement blade for separating knife |
Procedure
- Press [▼] several times to display the screen shown below.

- Press [▶] once, and then press [▼] several times to display the screen shown below.
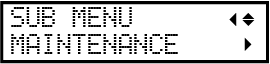
- Press [▶] once, and then press [▼] several times to display the screen shown below.

- When the following screen is displayed, open the front cover.
 Preparation is complete once the following screen is displayed.
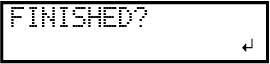
- Remove the separating knife.
- Grasp the screw portion, and slowly pull in the direction of the arrow.When doing this, do not pull it back toward you.

- Grasp the screw portion, and slowly pull in the direction of the arrow.
- Install a new knife.Slide the knife to align it with the groove (). The knife is secured in place by the magnet().

- Slowly insert the knife into the groove.

- Loosen the screw.Take care to ensure that the knife does not slip out of position at this time.

- Press [ENTER].When the following screen is displayed again, the blade replacement is finished.