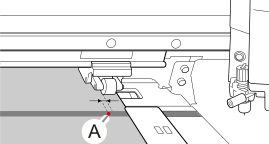
When you set up media, the base point (A) is set to the blade protector position in the feed direction and to approximately 2 mm (0.08 in.) to the left of the left edge of the right pinch roller in the scan direction (this is the initial state).
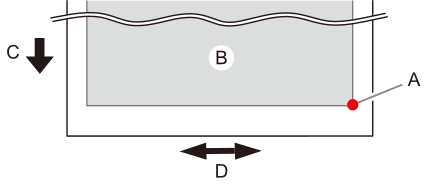
The base point (A) indicates the right edge of the printing area (B). (C: media feed direction, D: print-head carriage movement direction) You can change the base point to print on the targeted location, enabling you to use media without being wasteful.
Set the base point for each individual page. When the printing of one page finishes, the base point returns to its default value.
MEMOPerforming Printing Tests Arranged Horizontally is possible with printing tests. When you select Feed, the position moves in the feed direction to match the printing test size, but the set position is maintained in the scan direction.
Procedure
Set up the media.
Tap Move on the home screen.
The [Move] screen appears.
Tap .
The cutting carriage moves to the current base point.
Tap and move the cutter center to the position where you want to start cutting.
Tap or to move the media in the feed direction (forward-back). Tap or to move the cutting carriage in the scan direction (left-right).
A: Base point (right edge of the printing area)
B: Printing area
Once the position has been decided, tap Set Base Point Here to confirm it.
The base point position is updated, and you are returned to the home screen.
MEMOThe base point setting icon () is displayed on the home screen to indicate that the base point position has been updated.

 Move on the home screen.The [Move] screen appears.
 .The cutting carriage moves to the current base point.

 and move the cutter center to the position where you want to start cutting.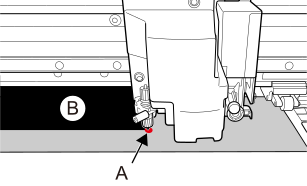
 ) is displayed on the home screen to indicate that the base point position has been updated.