
Preparing the Cleaning Liquid and the Ink
Prepare the cleaning liquid pouch and the ink pouch for each color. Then, set these pouches in ink/cleaning liquid cartridges.
IMPORTANT
- Be sure to use a new cleaning liquid pouch and new ink pouches.
- Never, under any circumstances, use anything other than the specified type of cleaning liquid or ink.
The cleaning liquid pouch and the ink pouches must be purchased separately. Contact your authorized dealer or visit our website (https://www.rolanddg.com/).
Procedure
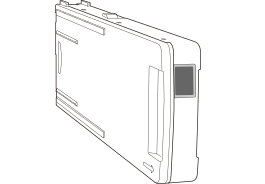
- Affix an ink label to the ink/cleaning liquid cartridge.
Affix the ink/cleaning liquid (CL) label to the position shown in the figure.
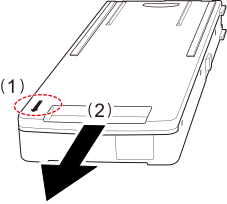
- Remove the ink/cleaning liquid cartridge cover.
- Keep the side with the arrow mark face up.
- Remove the cover by sliding it in the direction indicated by the arrow.
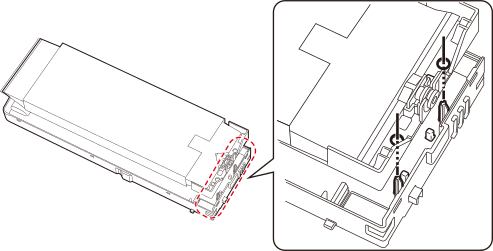
- Set the cleaning liquid pouch and the ink pouch for each color in the cartridge cases.
Check the ink pouch labels and insert them in the cases with the labels for the same colors, which were affixed to the cases in step 1.
IMPORTANTInserting ink cartridges into the machine without realizing that ink pouch colors and labels are mismatched may result in malfunction.
MEMOTo set the pouch in the correct position, pass the protrusions on the cartridge case through the holes in the pouch.
- Attach the cover to the cartridge case.
- Insert the protrusions (A) at the back of the cover into the holes in the cartridge case.
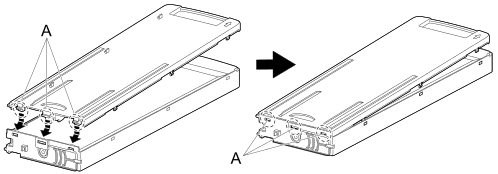
- Push the cover to fit its hooks into the holes in the cartridge case.There are hooks in six locations. Check that all the hooks are seated in the holes and that the cover does not come loose from the cartridge case.
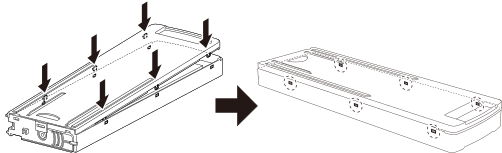
- Insert the protrusions (A) at the back of the cover into the holes in the cartridge case.