5. Perform printing.
Procedure
-
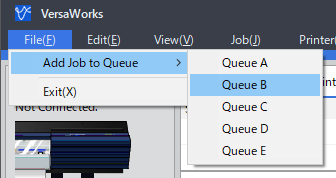
Click [File], [Add Job to Queue Folder] to select the queue folder to use.
The file opening screen is displayed.

-
Select the printing data to add to the job list, and then click [Open].
The selected data is displayed in the job list. To add more jobs, repeat step 1, 2.MEMO:
You can add jobs to the job list directly by dragging the icon for the printing data to the queue folder's job list.
-
In the job list, double-click the job whose print settings you want to change.
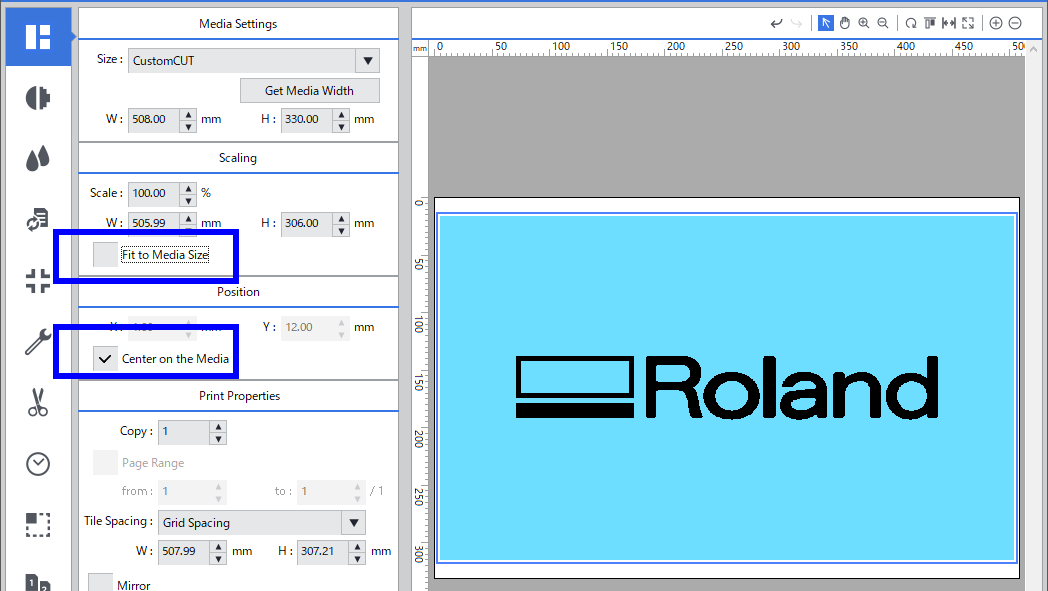
The job settings screen is displayed. Use this screen to fit the print data in the print area and adjust its position. The white part in the layout area is the loaded print area. The portion that is not in the print area will not be printed.

MEMO:- Fit to Media Size: The print data is adjusted to match the print area.
- Center on the Media: The print data is placed in the center of the print area.
MEMO:The orientation displayed on the VersaWorks screen is the opposite of the actual print orientation. Make sure the orientation of the object to be printed on is correct.
Display on the VersaWorks screen Actual print orientation
-
When the printing position is adjusted, click [OK].

-
Click
 .
.

Printing starts.When the printing ends, the screen shown below appears on the display screen of the printer.
When this screen is displayed, no data is accepted from the computer.MEMO:If [PRT CONTINUE] is set to "ENABLE", the screen shown in the figure (Continuously Printing Multiple Sets of Data) does not appear.
-
Press [ENTER].
The screen shown below appears once more, and data from the computer can be accepted again.


