
Step 1: Batch Settings for Cutting with Crop Marks
To ensure the optimal output according to the media size and type, you can configure various settings on this machine. However, it is hard work to configure these settings one at a time. You can use the "MEDIA SETTING" menu to configure the absolute minimum of necessary items as a batch. You can save the setting details as a preset.
Note that you can set all the items set here individually as well.
1. Start the "MEDIA SETTING" menu.
- Press [ENTER].

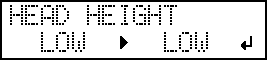
2. Adjust the print head height.
-
Press [◀] to select "CHANGE".

-
When the following screen is displayed, open the front cover.
-
Move the height-adjustment lever to adjust the head height.
When you change the position of the height-adjustment lever, the display screen changes and the buzzer sounds at the same time.

Position Display screen 
"HIGH" 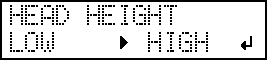

"LOW" 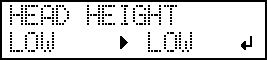

"Sp.LOW" 
IMPORTANT: When you have moved the height-adjustment lever to "Sp.LOW", remove the media clamps. The print head coming into contact with a media clamp may lead to malfunctions.MEMO:-
Normally move the height-adjustment lever to "LOW". For media that is wrinkled or comes loose from the platen during printing, move the height-adjustment lever to "HIGH".
-
The printing quality degrades as the distance between the media and the print heads increases. Do not move the height-adjustment lever to "HIGH" needlessly.
-
3. Perform position adjustment of the feed direction (reduce horizontal stripes).
-
Press [◀] to select "SET".

-
Press [ENTER].

-
View the printed test pattern, and then determine the correction value.
The current correction value () is that of the figure indicated by "
 ." Select the value to make the gap () and overlap () between the upper/lower squares smallest (
 ). In the case of the following figure, select "-0.40." When you cannot choose between two sequential numbers, specify a value that is between them.
-
Press [▲] or [▼] to select the correction value.
-
Press [◀] to select "SET".

-
Press [ENTER] to confirm your entry.
The test pattern is printed again. Check that the gap and overlap are the smallest for the figure indicated by (that is, the current correction value). If the gap and overlap are smaller for another figure, return to step 5. to perform the setting again.
If you do not need to change the correction value, press [ENTER] again.
-
Press [▶] to select "DONE".

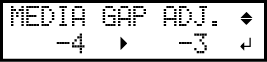
4. Adjust the misalignment of the ink landing position.
-
Press [◀] to select "SET".

-
Press [ENTER].
-
View the printed test pattern, and then determine the correction value.
Select the value that gives the least misalignment between the two lines. In the case of the following figure, select "-3." When you cannot choose between two sequential numbers, select a value that is between them (you can set correction values in units of "0.5").

-
Press [▲] or [▼] to select the correction value.
-
Press [◀] to select "SET".
-
Press [▶] to select "DONE".
-
Press [▶] to select "NEXT".

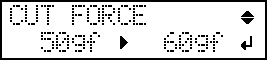
5. Set the blade force.
-
Press [◀] to select "SET".

-
Press [◀] to select "SET".

-
Peel off the two cut shapes (a circle and a square).

-
Check how the two shapes peel off.
- Two shapes are peeled off together/backing paper is also cut
-
Press [◀] to select "YES".

- Two shapes are peeled off separatelyPress [▶] to select "DONE".

-
Press [▲] or [▼] to adjust the blade force.
-
If the two shapes are peeled off together → increase the blade force.
-
If the backing paper is also cut → reduce the blade force.
-
-
Check how the two shapes peel off.
- Two shapes are peeled off together/backing paper is also cutPress [◀] to select "YES".
- Two shapes are peeled off separatelyPress [▶] to select "DONE".
- Two shapes are peeled off together/backing paper is also cut
6. Correct the misalignment of the printing and cutting positions when using crop marks.
-
Press [▶] to select "NEXT".

-
Press [◀] or [▶] to select "NEXT" or "SET".
Select "NEXT" when you will not print crop marks. Select "SET" when you will print crop marks.

-
Check the test pattern (C&C1) condition.
Check whether the printing position (shaded part) and the cutting position (outer frame) are aligned. An example of the printing position and the cutting position being misaligned is shown in the following figure."F" indicates the feed direction of the media (the feed direction) and "S" indicates the direction of print head movement (the scan direction).

-
Determine whether to correct the misalignment.
- Cutting position and printing position are not aligned
Press [◀] to select "YES".
- Cutting position and printing position are alignedPress [▶] to select "DONE".
- Cutting position and printing position are not aligned
-
Press [ENTER].
-
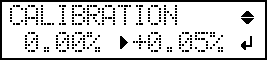
Check the correction values from the test pattern (C&C2) condition.
The point where the cutting line (
) intersects the correction-value scale () is the correction value. In the following figure, the correction value is "−0.3."Check the media feed direction (the feed direction) and the direction of print head movement (the scan direction).

-
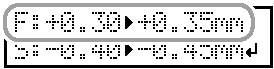
Set the correction values for the feed direction "F" and the scan direction "S."
-
Press [▲] or [▼] to set the correction value for the feed direction (F).
-
Press [◀] or [▶] to set the correction value for the scan direction (S).

-
Press [▲] or [▼] to set the correction value for the feed direction (F).
-
Determine whether to correct the misalignment.
- Cutting position and printing position are not aligned
Press [◀] to select "YES".
- Cutting position and printing position are alignedPress [▶] to select "DONE".
- Cutting position and printing position are not aligned
7. Save the settings as a preset.
-
Press [◀] to select "SAVE".

-
Press [▲] or [▼] to select a destination to save the preset.
You can select a name from NAME1 to NAME8.

-
Set the name.
-
Set the following characters in the same way.
You can enter up to15 characters.

-
Set the following characters in the same way.
-
Press [ENTER] to confirm your entry.

Canceling Batch Settings before They Are Completed
-
Press [◀] to select "YES".

-
Press [ENTER] to confirm your entry.
The screen shown below appears again.
Selecting "NO" in step 2 returns you to the screen that was displayed when you pressed [MENU].
MEMO:Even if you cancel media settings before they are completed, the values set so far will be saved.