
Replacing the Blade
If the blade becomes dull, if the edge of the blade is chipped, or if the cutting quality is lowered, replace the blade with a new blade.
Be sure to perform operations as specified by the instructions, and never touch any area not specified in the instructions.
Otherwise sudden movement of the machine may cause injury.
Never touch the tip of the blade.
Doing so may result in injury.
| Required item |
|---|
 |
| Replacement blade |
1. Replace the blade.
-
Press [▼] several times to display the screen shown below.

-
Press [▶] once, and then press [▼] several times to display the screen shown below.

-
Press [▶] once, and then press [▼] several times to display the screen shown below.

-
When the following screen is displayed, open the front cover.

Preparation is complete once the following screen is displayed.
-
Detach the blade holder.

-
Replace the blade.
-
Insert a new blade (C).
Orient the tip of the blade (D) correctly.

-
Insert a new blade (C).
-
Install the cutting tool in the cutting carriage.

-
Tighten the screw.
Tug the blade holder upward to make sure it does not come loose.

-
Press [ENTER].
When the following screen is displayed again, the blade replacement is finished.
2. Make adjustments according to the new blade.
-
Press [▼] several times to display the screen shown below.

-
Press [▶] to display the screen shown below.

-
Check the results of the cutting test.

Check item Result Setting item Adjustment Check the shape. The cut shape is distorted. "SPEED" Reduce Peel off the circle. The square also peels off. "FORCE" Increase Some uncut areas remain. "SPEED" Reduce Peel off the square. The blade leaves faint traces on the backing paper. "FORCE" No change The blade trace is indistinct. Increase The blade trace is too deep and cuts into the backing paper. Reduce Check the shape of the square you have peeled off. 
The corners are not rounded and do not have "horns." "OFFSET" No change 
The corners are rounded. Increase 
The corners have "horns." Reduce -
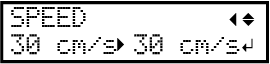
Press [▲] or [▼] to select the cutting condition you want to set.
Display screen (cutting conditions) Setting details Default settings 
Set the force (pressure) of the blade. 50 gf 
Set the speed of cutting. 30 cm/s 
Set the blade offset. Enter the listed offset value for the blade.
The offset value for the included blade is 0.250 mm (9.8 mil).
0.250 mm 
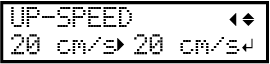
Set the blade's up speed during cutting (the speed at which the blade travels when it moves to the next cutting line after cutting one cutting line). If the media comes loose during no-load feed and the blade damages the surface of the media, reduce the speed. 30 cm/s -
Press [▶] to display the screen shown below.


3. Accurately adjust the cutting-in amount.
 ) is 0 mm at minimum (
 ) and 2.5 mm (98.4 mil) at maximum (
 ).
). 
- Rough Estimate for the Amount of Blade Extension (When Creating a Sticker)
Set the amount of blade extension (
) to an amount that is the sum of the thickness of the material portion () and half ( ) the thickness of the backing paper ().

- Rough Estimate for the Amount of Blade Extension (When Cutting Perforated Lines)
Set the amount of blade extension (
) so that when the blade pierces the media (), the blade tip extends slightly.For information about the output settings for cutting perforated lines, refer to the documentation for VersaWorks.

Pushing the blade out too far will damage the blade and blade protector and hasten their deterioration, so exercise caution.