Cleaning during Printing
This machine counts the hours of printing, and when the accumulated printing hours reach a specified time, automatic cleaning is performed. When cleaning finishes, the accumulated printing time is reset. This cleaning is performed during printing, so print quality may be affected. To avoid cleaning during printing, first obtain the time until cleaning is performed. Next, use the software RIP to confirm the required time for printing. If the required time for printing is greater than the time until cleaning, perform normal cleaning prior to printing. This will cause the accumulated printing time to be reset. Alternatively, change the print quality to reduce the time required for printing. Either of these methods can be used to prevent cleaning from being performed while printing is in progress.
1.Confirm the accumulated printing time.
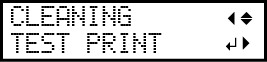
- Press [▼] several times to display the screen shown below.

- Press [▶] once, and then press [▼] several times to display the screen shown below.
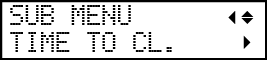
- Press [▶] to display the screen shown below.
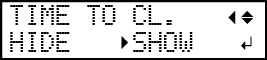
- Load the media to display the screen shown below.The time until cleaning is performed is displayed on the screen after "CL.".

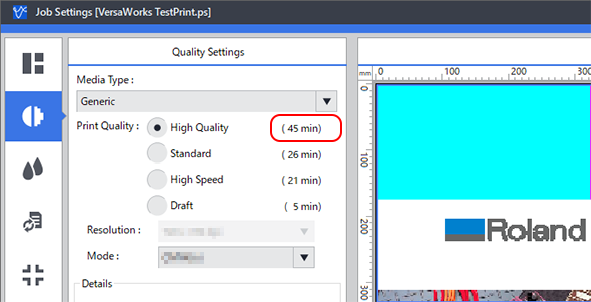
2.Confirm the required time for printing.
-
Confirm the required time for printing.
3. Perform normal cleaning.
- Press [▼], then [▶][▼] to display the screen shown below.

- Press [ENTER].The screen shown below appears, and then cleaning starts. The (approximate) remaining time for the procedure is displayed on the screen. (The display shown below is an example. "01:45" = "1 minute and 45 seconds")
 When finished, the screen shown below appears again.
 - Press [▲].