Replacing the Wipers
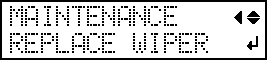
When the following screen is displayed, it is time to replace the wiper.

For information about purchasing wipers, contact your authorized Roland DG Corporation dealer or visit our website (http://www.rolanddg.com/).
CAUTION:
Be sure to perform operations as specified by the instructions, and never touch any area not specified in the instructions.
Otherwise sudden movement of the machine may cause injury.
| Required items | |
|---|---|
 |
 |
| Wiper | Tweezers |
-
Press [ENTER] when the following screen appears.
-
Press ▼ several times to display the screen shown below.

-
Press ▶ once, and then press ▼ several times to display the screen shown below.

-
Press ▶ to display the screen shown below.
-
Press ENTER.
The cutting carriage moves to a location where wiper replacement is possible, and then the screen shown below appears.

-
Open the right cover.

Preparation is complete once the following screen is displayed.
IMPORTANT:Do not press ENTER at this stage. Press ENTER after replacing the wiper. If you press ENTER at this stage, close the right cover according to the instructions on the screen, wait for the following screen to be displayed, and then press ENTER again.
-
Touch the location shown in the figure to discharge any static electricity.

-
Replace the wipers.
-
Attach the new wipers.
Place the inclined end of the wiper on the back side of the machine. If the wiper is installed with the incorrect orientation, appropriate cleaning will not be possible.Be sure to attach the wipers to the hooks. Failure to do so may result in dot drop-out or other problems.

-
Attach the new wipers.
-
When the following screen is displayed, close the right cover.

When the following screen is displayed again, the wiper replacement is finished.