
Step 2: Selecting the Media
To use registered media, select the desired media from the list of available media. To use unregistered media, see Setting Up New Sheet Media.
Procedure
- Tap
 Setup.The registered media is displayed in a list.
 - Select the media name to use.MEMO You can search for media in the media list by keyword and register media as favorites. The media list can also be set to show only media registered as favorites. Keyword searching and favorites registration can be used at the same time.
- Searching for keywords in the media list
- Tap
 .
. - Enter the media to search for.Searching for partial matches instead of exact matches is also possible.
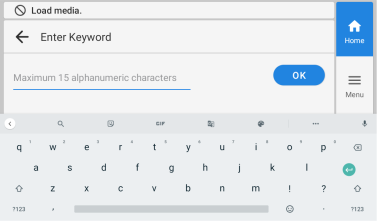
- Tap OK.
Media filtered according to the keywords will be displayed.
- Select the media to use from the search results.
- Tap
- Registering media to favorites and showing only media registered as favorites
Tap
 for the media to register it to favorites.
The icon for the favorited media will be displayed as
 .To show only media registered as favorites, tap the icon indicated below.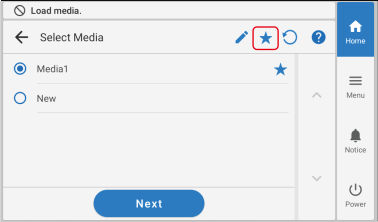
To reset the keyword search or favorites registration, tap
 .
.When using both the keyword search and favorites registration, each function can also be reset individually.
To reset the keyword search, tap
to delete the keyword.To reset the favorites registration, tap
for the media you want to reset.
- Searching for keywords in the media list
- Tap Next.
- Enter the length of the loaded media, and tap OK.
- Tap Start Setup.The cutting carriage moves and detects the width of the media and the positions of the media clamps. This operation is called initialization.
- When Printing Area (Width) screen appears, use the following procedure to configure the settings.MEMO The media selected in step 2 is media whose printing area was set manually when registered as new media. The printing area must be set manually each time, so the Printing Area (Width) screen appears.
- Hold down
 or
or  to move the center of the blade (A) approximately 2 mm (0.08 in.) to the inside (B) from the left edge of the right pinch roller.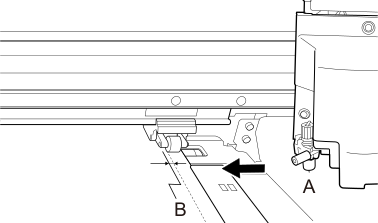
- Hold down or to move the center of the blade (A) approximately 2 mm (0.08 in.) to the inside (B) from the right edge of the left pinch roller.
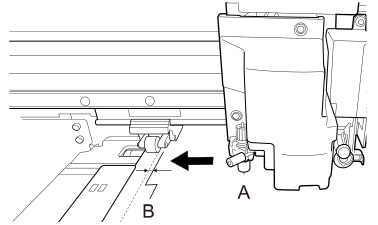
- Hold down