Replacing the Dummy Pin Cleaner
Replace the dummy pin cleaner if it becomes damaged and when the recommended replacement time is reached.
When the dummy pin cleaner reaches the recommended replacement time, a message reminding the user to replace the cleaner will be displayed in VPanel.
Do not continue using the dummy pin cleaner if it is damaged or if the recommended replacement time has passed.
Continuing to use the cleaner may affect the milling quality and lead to machine malfunctions.
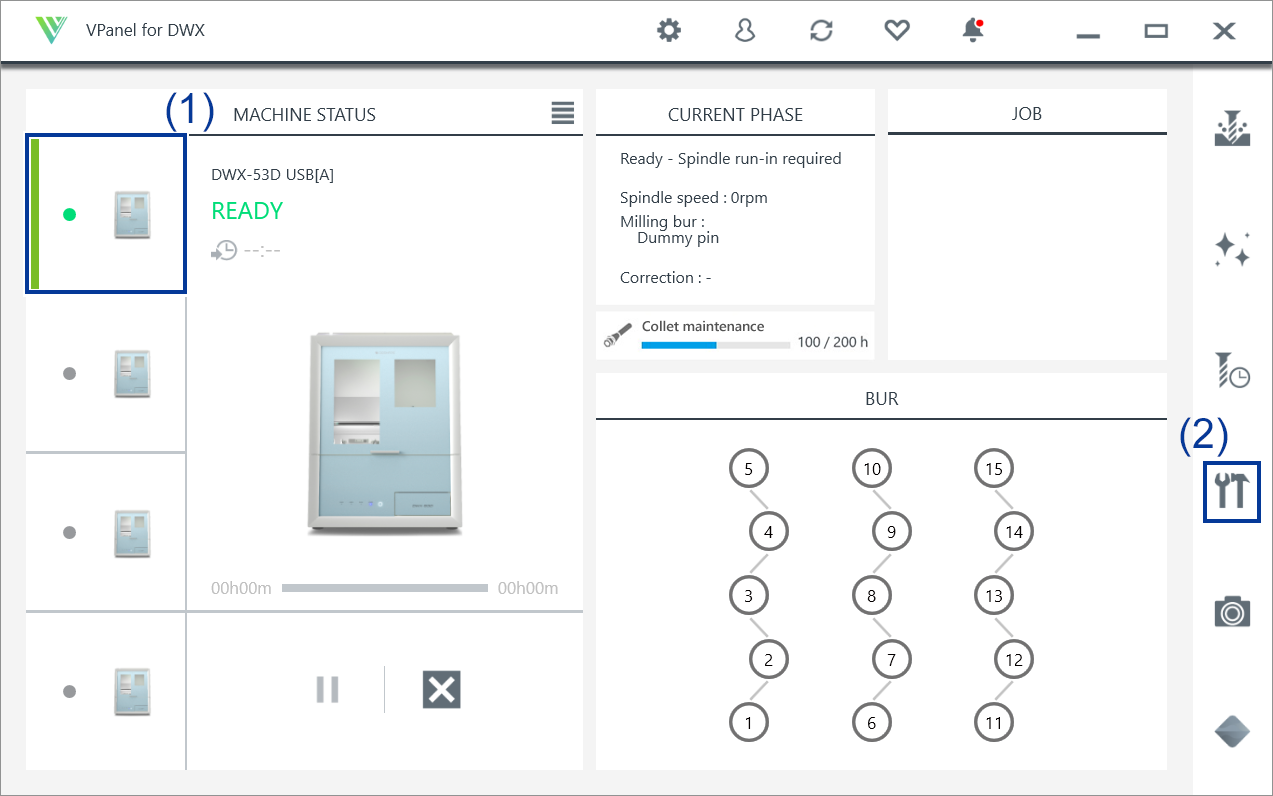
- Show VPanel.
-
Open the Machine settings window.
-
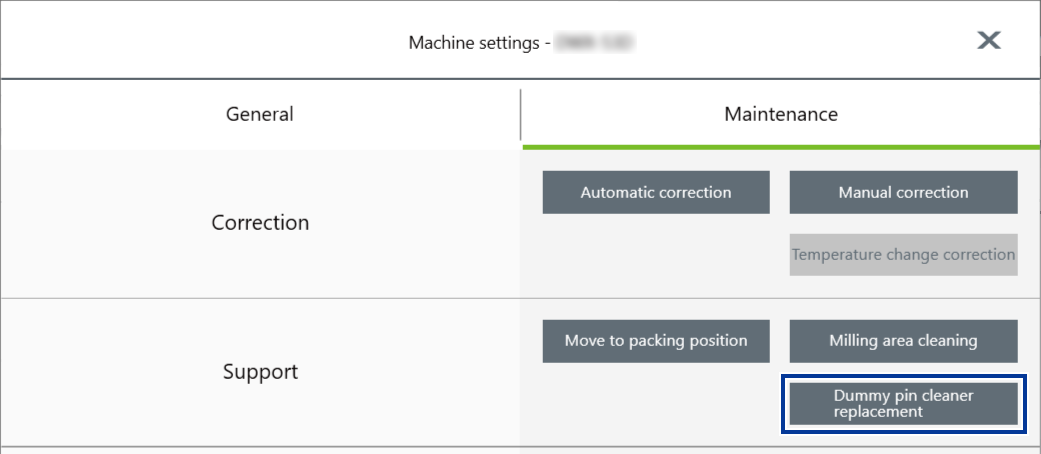
On the Maintenance tab, click Dummy Pin Cleaner Replacement.

-
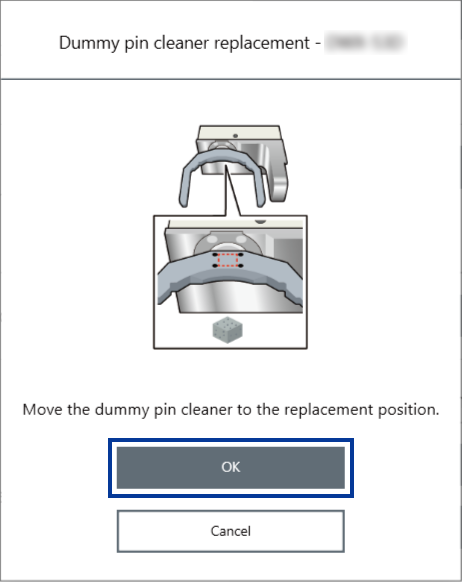
When the window shown in the following figure appears, click OK.
The rotary axis unit will move to a position that allows for work.

-
Open the front cover.
Pull until a click is heard.
-
Slowly peel off the dummy pin cleaner affixed to the clamp.
If milling waste is found where the dummy pin cleaner was removed, wipe it off with the included cloth for care.
-
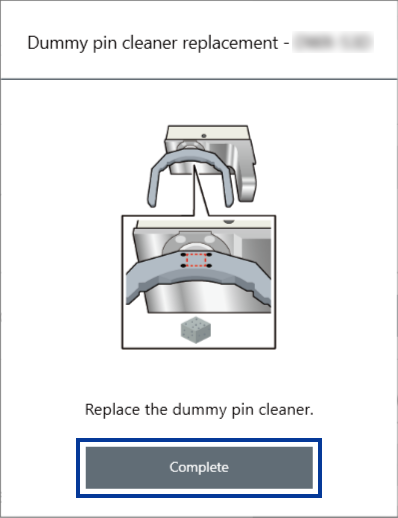
Remove the backing paper protecting the adhesive surface of the new dummy pin cleaner and affix the cleaner in the position indicated below.
Gently fold and affix the dummy pin cleaner to cover the clamp bottom and slope.
MEMOAffix the dummy pin cleaner so that the adhesive surface does not protrude beyond the outer circumference of the clamp.
If the adhesive surface protrudes from the clamp, it may interfere with operation of the machine during milling, which may affect milling quality.
-
After affixing the new dummy pin cleaner to the clamp, click Complete.

-
Close the front cover.
Gently pull up on the front cover and then lower it until a click is heard.
Dummy pin cleaner replacement is complete when the rotary axis unit moves to its original position and The operation is complete. is displayed.
 .
.