Step 3: Adjusting Cutting

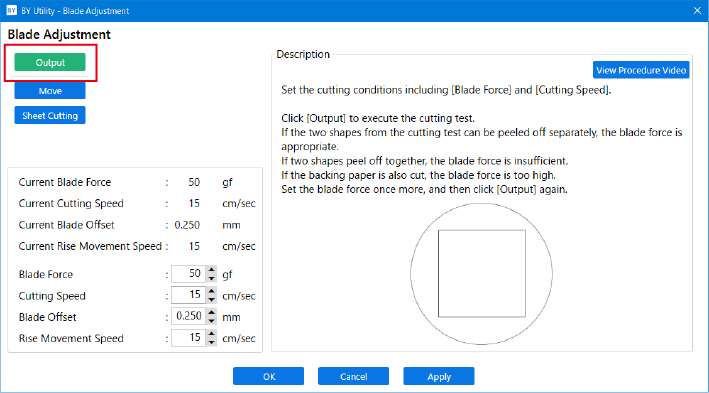
For high-quality cutting, we recommend carrying out a cutting test to check the cutting quality for the media before you perform actual cutting. Adjust the blade force depending on the cutting quality.

MEMO

Use the following link to view a reference video for this procedure. We recommend that you view this video to understand the overall flow of work.

https://youtu.be/a_wRdd3JMZ8
a_wRdd3JMZ8

The BN2-20/20A is shown in this video, but the work and operation procedures are the same for this machine.

Procedure
  1. Close the front cover.
  2. On the home screen, click VG3_Panel_Icon_CUTADJ Blade Adjustment.
  3. Click Output.

    The test pattern is cut.

    Utility_CutTest
  4. Peel off the cut shapes and change the Blade Force settings according to the cutting quality.


    • Two shapes are peeled off separately

      You do not need to perform the setting because the blade force is appropriate.
    • Two shapes are peeled off together

      Increase the blade force.

    • Backing paper is also cut

      Decrease the blade force.

  5. Click Apply.
    The changed settings are saved.
  6. Click Apply again.
    The test pattern is cut.
  7. Check whether the correction was successful.
    In the Apply menu, you can also make settings for other cutting conditions in addition to the blade force.
  8. Click OK to return to the original screen.