Setting the Base Point
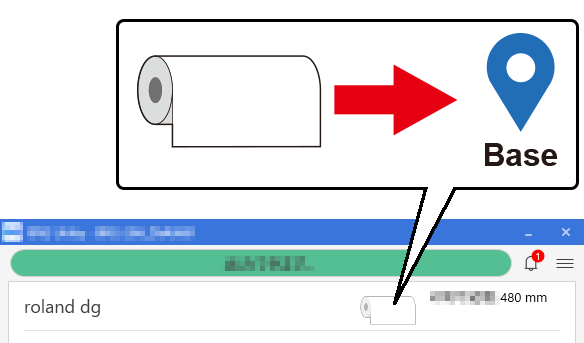
The base point () indicates the right edge of the output area (). (: Media feed direction, : print-head carriage movement direction) You can print without setting the base point, but setting the output area enables you to use media without being wasteful and also to print on the targeted location.
Set the base point for each individual output. When one output finishes, the base point returns to its default value.
Note that the left and right positions are not restored to their defaults for test patterns.
- Set up the media.
-
Click
Move.
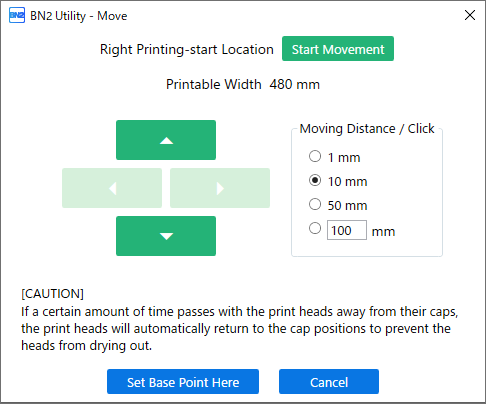
The Move window appears.

-
Select Moving Distance / Click.
MEMO The Moving Distance / Click value can also be entered as desired.
-
Click Start Movement.
The media and the print-head carriage move to the current base point.
IMPORTANTIf 20 seconds elapse without
 ,
,  ,
,  , or
, or  being pressed or if 3 minutes elapse from the start of setup, to prevent the print heads from drying out, the print-head carriage returns to the position from before it started moving. Start the setup again after the drying prevention operation finishes.
 -
Click
 ,
,  ,
,  , or
, or  to move the center of the blade to the position that you want to set as the base point.
MEMO
to move the center of the blade to the position that you want to set as the base point.
MEMOTo continue moving the blade, wait for the print-head carriage or media operation to stop, and then click these buttons again.
MEMOClick
 or
or  to move the print-head carriage. Click
  or
or  to feed or pull back the media.
- : Output area
- : Base point (right edge of the output area)
-
Once the position has been decided, click Set Base Point Here to confirm it.
The base point is set to the current position of the center of the blade, and you are returned to the home screen.MEMO
The display of the icon on the home screen changes to indicate that the base point position has been updated.

