
Set the Computer's Network (Windows)
This manual contains an operation explanation for the following version. Operations and names may vary depending on the version and build of the OS.
- Windows 11
Version 24H2
- Windows 10
Version 22H2
Procedure
- Log on to Windows as the Administrator or a member of the Administrators group.
-
Open Control Panel.
Search for "Control Panel" from the taskbar.
- Click Network and Sharing Center.
- Click Ethernet or Wi-Fi.
-
Click Properties.
If the User Account Control dialog box appears, click Continue.
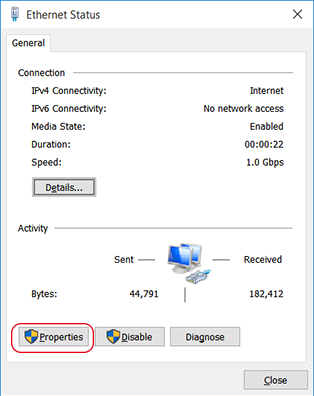
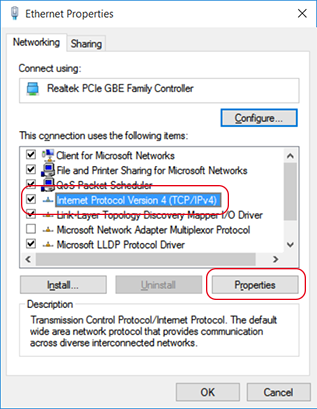
The Ethernet Properties or Wi-Fi Properties dialog box appears.
-
Select Internet Protocol Version 4 (TCP/IPv4), and then click Properties.
If the Internet Protocol check box is clear, select it.
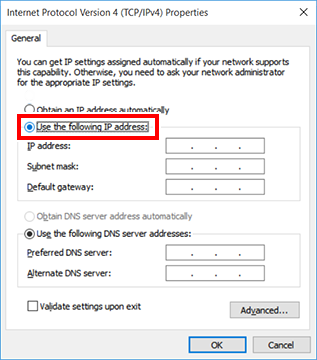
-
Select Obtain an IP address automatically and click OK.
-
Click the following buttons to return to the original state.
- Close in the Ethernet Properties or Wi-Fi Properties dialog box
- Close in the Ethernet Status or Wi-Fi Status dialog box