
3. Check and correct the printing test results.
Procedure
-
Check the test pattern.

The value below the location where there is the least deviation between the overlapping lines is the correction value. In the figure above, the value where there is the least deviation is +4.
-
Check the value that is displayed in the box on the right side of Print.
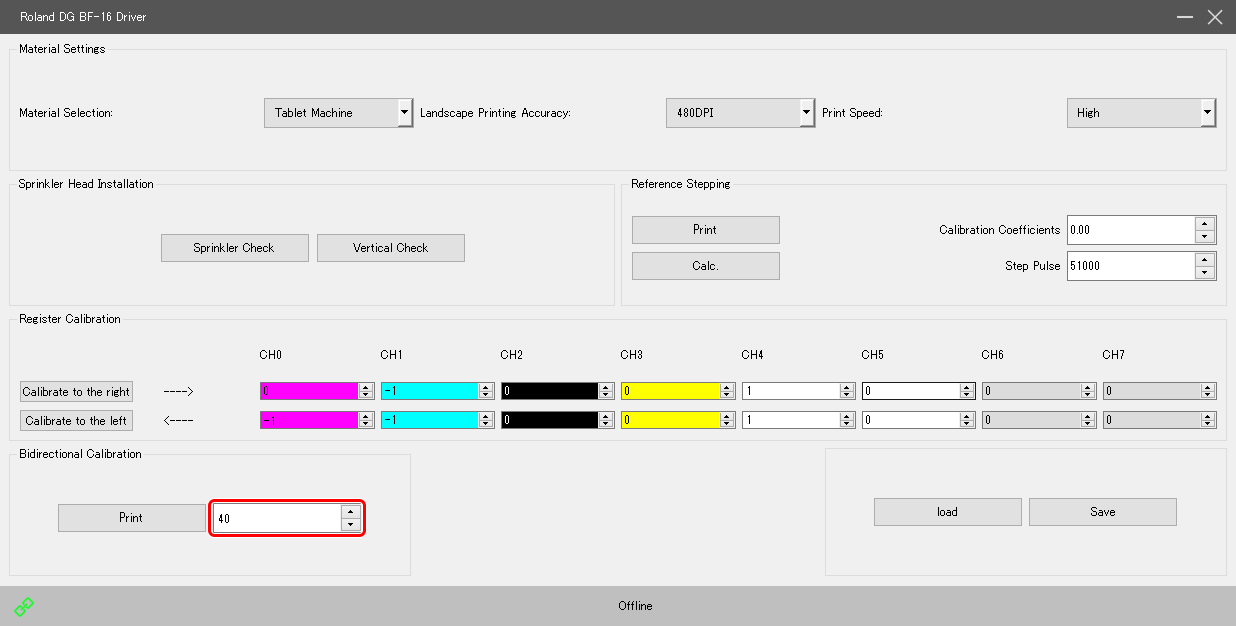
The value displayed in the box in the above figure is 40.
-
Enter the correction value into the box on the right side of Print.
The correction value is the value that was displayed in the box on the right side of Print plus the value where there is the least deviation. In this example, enter 44.
- Click Save.
- Attach the object to be printed on for the printing test.
- Perform the printing test again.
-
Check the test pattern.
Adjustment is completed if the least amount of deviation is at the 0 position.
If it is deviated, check the correction value and repeat adjustment until the least amount of deviation is at the 0 position.
- Click × to close the window.