
Étape 1: Creating Printing Data
Set the printing size, and then create the print data.
RAPPEL Follow the procedure below to operate FlexiDESIGNER Ver. 22.0.4, build number 4398. Operation methods may vary depending on the version of FlexiDESIGNER.
Procédure
-
Follow the procedure below to start FlexiDESIGNER.
-
Follow the procedure below to set the size of the printing data.
-
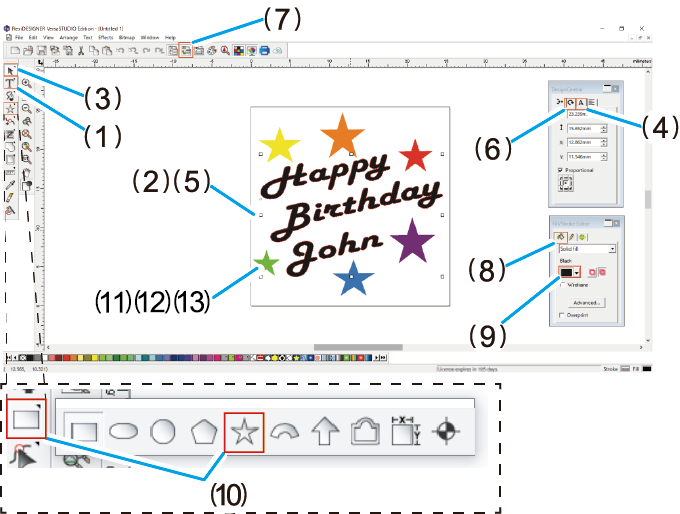
Click the
 icon (A).
The DesignCentral dialog box (B) opens.
icon (A).
The DesignCentral dialog box (B) opens. -
On the
 tab (C), click the pull-down menu [▼], and then select Utilisateur.

-
Click the
-
Create data for printing.
In this section, you design the message and the shapes. Specify the fonts and angles of text, the sizes of shapes, and other parameters.
-
Click
 Outil Texte.
-
Click
 Seléctionner l'outil, and select the text entry.
-
Click the
 tab in the DesignCentral dialog box, and then adjust the font and size.
-
Click the
 tab to adjust the angle.
-
Click the
 icon.
icon.
-
With the text selected, click the pull-down menu in the
 tab, and then select Remplissage uni.
-
Hold down
 Outil rectangle, and then select
  Outil étoile.
-
With the shape selected, click the pull-down menu in the tab, and then select Remplissage uni.
-
Click
- Click to save the data.