
Step 1: Creating Printing Data
Measure the printing size of the object, set the printing area, and then create print data.
MEMO Follow the procedure below to operate FlexiDESIGNER Ver. 22.0.0, build number 4176. Operation methods may vary depending on the version of FlexiDESIGNER.
Procedure
-
Measure the printing area (print surface of the object).
This is necessary to set the printing area. Make a note of the measurement when you take it. The print surface of the powder foundation case to be printed in this case is 111 mm (4.37 in.) wide, and 71 mm (2.79 in.) long.
-
Follow the procedure below to start FlexiDESIGNER.
-
Follow the procedure below to set the size of the printing data.
-
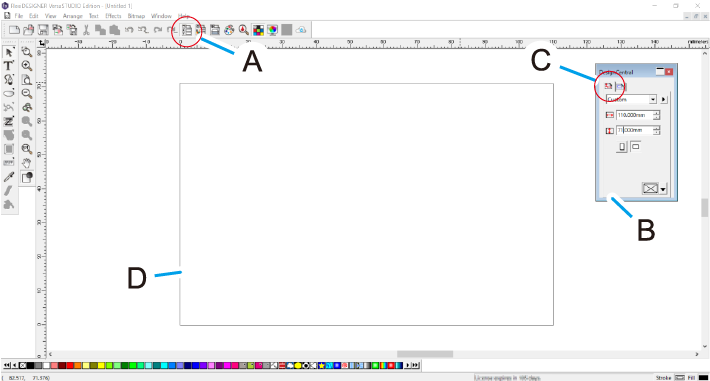
Click the
 icon (A).
The DesignCentral dialog box (B) opens.
icon (A).
The DesignCentral dialog box (B) opens. -
On the
 tab (C), click the pull-down menu [▼], and then select Custom.
-
Click the
-
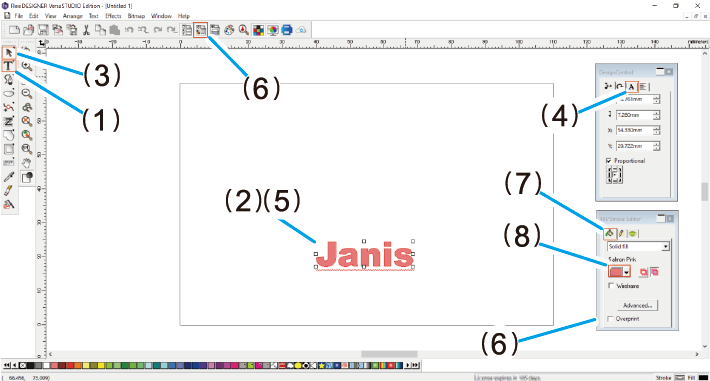
Create data for printing.
Enter a name here, and apply a color to the text.
-
Click
 Text Tool.
-
Click
 Select Tool.
-
Select the text you entered, and then click the
 tab in the DesignCentral dialog box to adjust the font and size.
-
Click the
 icon.
The Fill/Stroke Editor dialog box opens.
icon.
The Fill/Stroke Editor dialog box opens. -
With the text selected, click the pull-down menu [▼] in the
 tab, and then select Silid fill.
-
Click
- Click to save the data.